 |
|||
|
|
|||
|
|
|||
| ||||||||||
|
|
 TM 9-1300-275/3
b. Appropriate decontaminant.
c. The toxic agent patching kit.
d. A wrecking bar for dismantling dunnage.
3-2 M494 CONTAINER.
2-2.1 Identification of M494 Container.
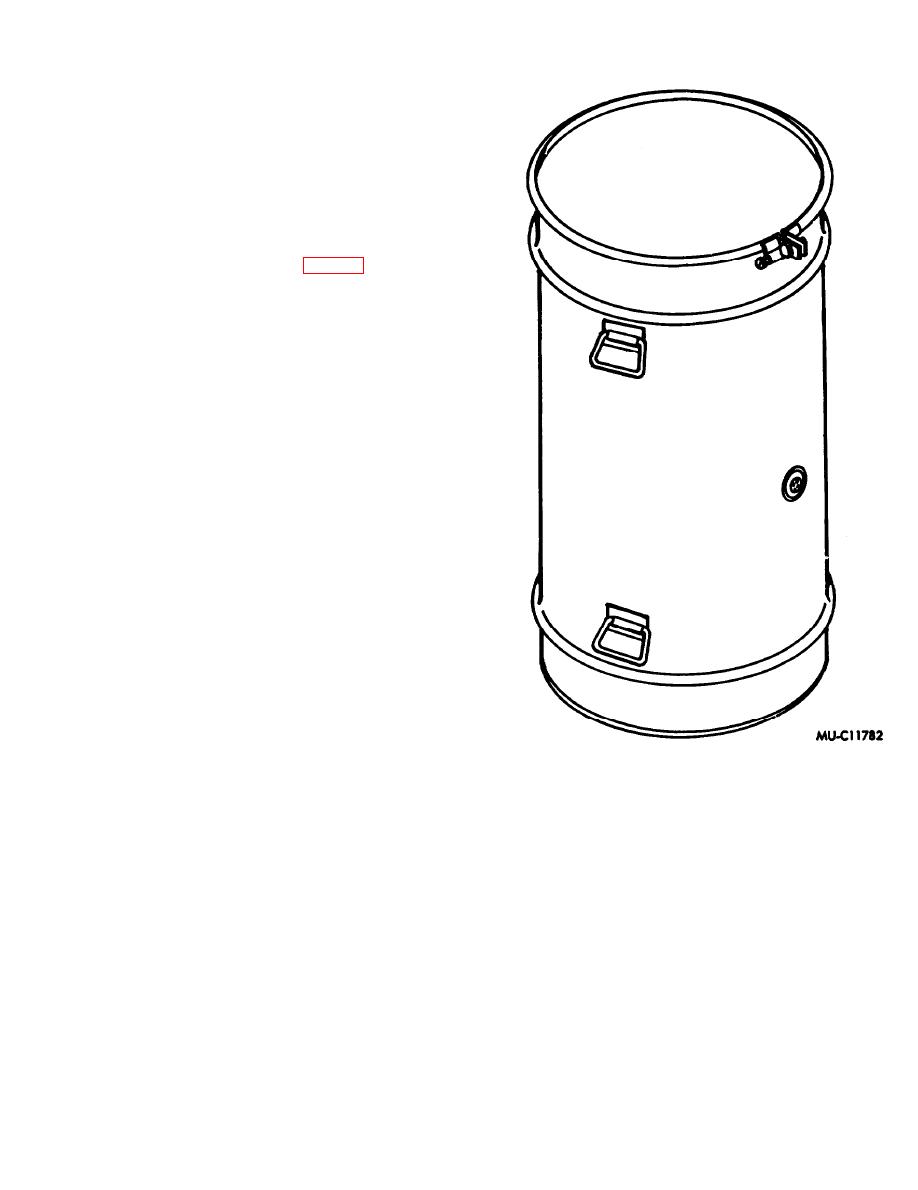
The M494 container resembles a 55-gallon steel
drum. It is 37 inches high and 24 inches in di-
ameter. Four spring-loaded, retractable handles
are welded to the drum (fig. 3-6). A venting port
is installed on one side of the container. An hu-
midity indicator is installed on the opposite side.
The lid is fastened to the drum by a locking ring
held in place and tightened by two locking-ring
bolts.
2-2.2 Hazards
Agent leaks' from defective seams, venting port,
humidity indicator, or handles.
2-2.3 Principles of Operation.
3-2.3.1 Testing. To assure that an M494 con-
tainer will not leak, check it (unless checked pre-
viously) during the 3-month period before a mis-
sion and immediately after a mission.
3-2.3.2 Examine the container for:
a Dents on lid or locking ring.
b. Dents on bottom edge.
c. Welds that have burned through the body
of the drum.
d. Loose port or humidity indicator.
3-2.3.3 If any of the foregoing defects are noted,
repair the defect, if possible. If defect cannot be
repaired, discard the item.
3-2.3.4 Using a 1/8-27 NPT tap and suitable
lubricant, cut threads on the inside of the vent
ing port. Avoid turning the tap too far in and
making the resultant, tapered, female threads
too large for the male threads on the tank valve.
Figure 3-6. M494 Container.
Correctly cut threads will not allow the shoulder
of the tank valve to touch the venting port.
of more than 10F. will invalidate the test.
3-2.3.5 At least once each year, replace the gas-
3-2.3.9 Containers passing this test should be
ket for the drum cover. Do not use any cement
so marked, including the date of the test. Loosen
when installing a new gasket.
the locking ring bolt all the way. Install another
3-2.3.6 For testing, insert one bolt with a flat
bolt, with flat washer, in the upper holes of the
washer under its nut into the lower hole of the
locking ring.
locking ring, and install the cover.
2-2.4 Use.
3-2.3.7 Pressurize the container at 5 psig., and
Assure that all items placed in these containers
dip various areas in water to check for leaks. Pay
are packed to prevent movement inside the con-
special attention to the lid gasket, the handles,
tainers. Sand, dirt, or other filler may be used.
port, humidity indicator, and bottom seam.
Install the container lid and tighten the locking-
3-2.3.8 If no leaks are detected, store the con-
ring bolts. Turn one bolt until slight resistance is
tainers and recheck the pressure 1 week later. If
felt; then tighten the other, alternating until both
the pressure drops more than one-half psig.,
bolts are snug. Check the locking-ring area for
reject the container. Check the temperature both
agent leakage.
times the container is pressurized. A variation
21
|
|
Privacy Statement - Press Release - Copyright Information. - Contact Us |