 |
|||
|
|
|||
|
Page Title:
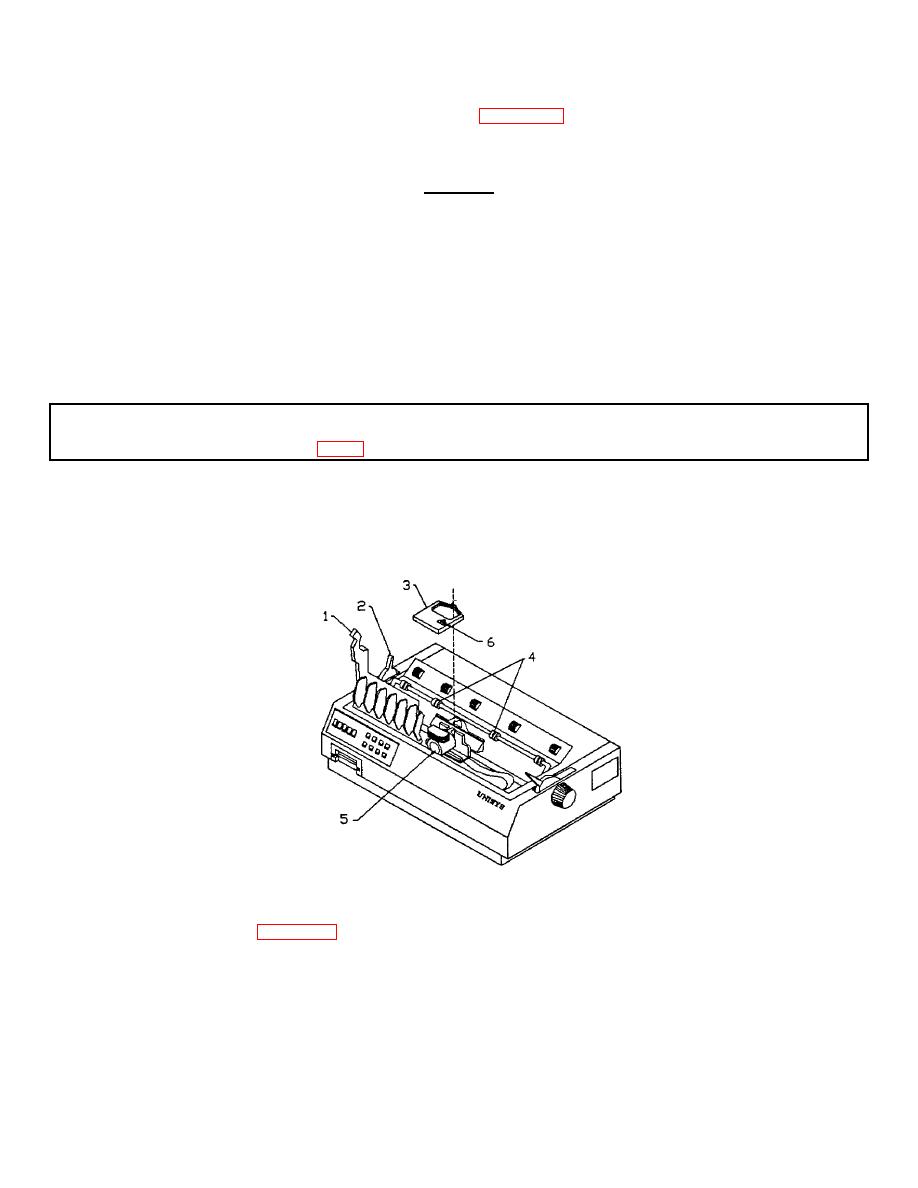
Figure 3-1. Printer Ribbon Replacement |
|
||
| ||||||||||
|
|
 TM 5-6350-275-10
a. Metal Parts. Use dry, clean wiping rags (Item No. 2, Appendix D) to remove dust, dirt, and moisture, or other
foreign matter from, ICIDS components. If foreign matter cannot be removed using dry wiping rags, dampen a rag with
water and gently wipe the area.
CAUTION
Do not use alcohol on any rubber parts or sealants. Alcohol may cause rubber parts to deteriorate and
may cause some sealants to dissolve.
b. Plastic Parts. Use clean dampened wiping cloths to clean dust, dirt, and other debris from plastic parts. Dry the
parts using a clean absorbent cloth.
3-3. REPLACE PRINTER RIBBON. This task consists of:
a. Remove
b. Install
Initial Setup:
Equipment Condition:
Materials/Parts
Printer is turned off.
Printer Ribbon (Item 7, App D)
CAUTION
To avoid shock, disconnect power cord and interface cable.
Figure 3-1. Printer Ribbon Replacement
a.
(1)
Open access cover (1).
(2)
Make sure bail (2) is closed.
(3)
Position printer ribbon (3) between bail rollers (4).
3-6
|
|
Privacy Statement - Press Release - Copyright Information. - Contact Us |