 |
|||
|
|
|||
|
Page Title:
Figure 8-20. Installing special gasket |
|
||
| ||||||||||
|
|
 TM 5-5430-209-12
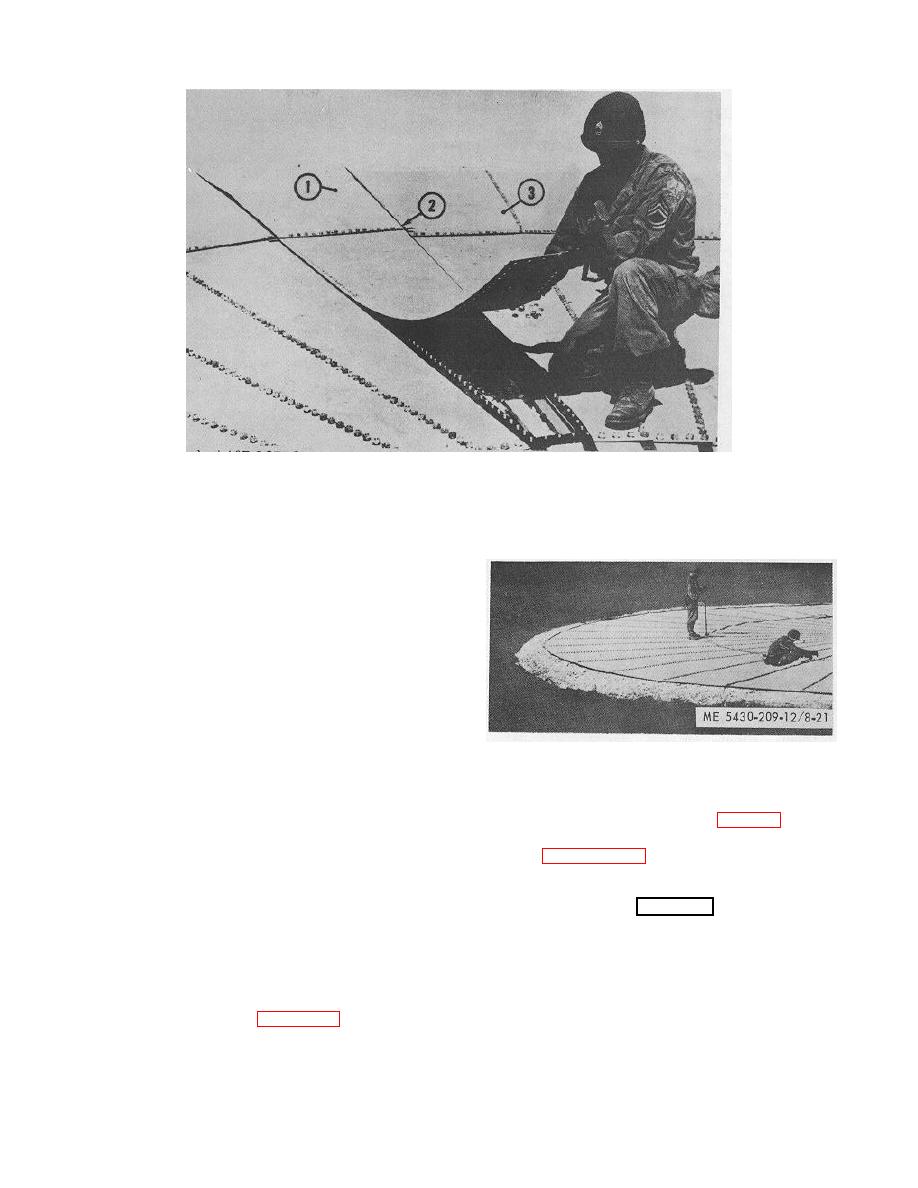
1. LAST BOTTOM SECTION
2. POINT OF INSTALLATION OF SPECIAL GASKET
3. NEXT-TO-LAST BOTTOM SECTION
ME 5430-209-12/8-20
Figure 8-20. Installing special gasket.
(b) Measure the actual length of this gap and
cut two pieces of strip gasket (2, fig. 8 13) to match this
length.
(c) Bevel each end of the gaskets. This will
make them seal tight against each other and against the
seam of the section.
(d) Remove the finger-tightened nuts along
the seam in the area of the gap.
(e) Block up the freed area of the seam with
a short length of 2-by 4-inch lumber, clear of the gap.
(f) Force a strip gasket over the bolts. Apply
Figure 8-21. Tightening bolts in tank bottom.
a heavy coating of sealing compound along the top face
8-6. Bolt Replacement Plug
and under each end of the gasket.
If threads are stripped on one or more bolts in the tank
(g) Force the remaining strip gasket over the
bottom during tightening process, drive out the bolts and
top of the first gasket.
replace it with a replacement plug (para 3-4).
(h) Remove the blocking so the section will
8-7. Testing Seams for Leakage
drop back to its original position.
Refer to paragraph 3-5 and test tank bottom seams for
leakage.
8-5. Tightening Tank Bottom
8-8. Sealing Seams
a. Work from small end of the sections and remove
WARNING
all finger-tightened nuts.
If tank is to be used for water storage, do
b. Install steel recessed washer, cup side down, and
not apply sealing compound to tank bottom.
nut on each bolt in the tank bottom except those in the
Sweep clean the tank bottom. With bottom dry, apply
outer circumference (chime) which secure the first stave
sealing compound to all bolts and seams.
rings.
c. Tighten all nuts in the tank bottom starting at the
small end of the sections. See figure 8-21.
8-11
|
|
Privacy Statement - Press Release - Copyright Information. - Contact Us |
