 |
|||
|
|
|||
|
|
|||
| ||||||||||
|
|
 TM
9-2350-238-20-2
29
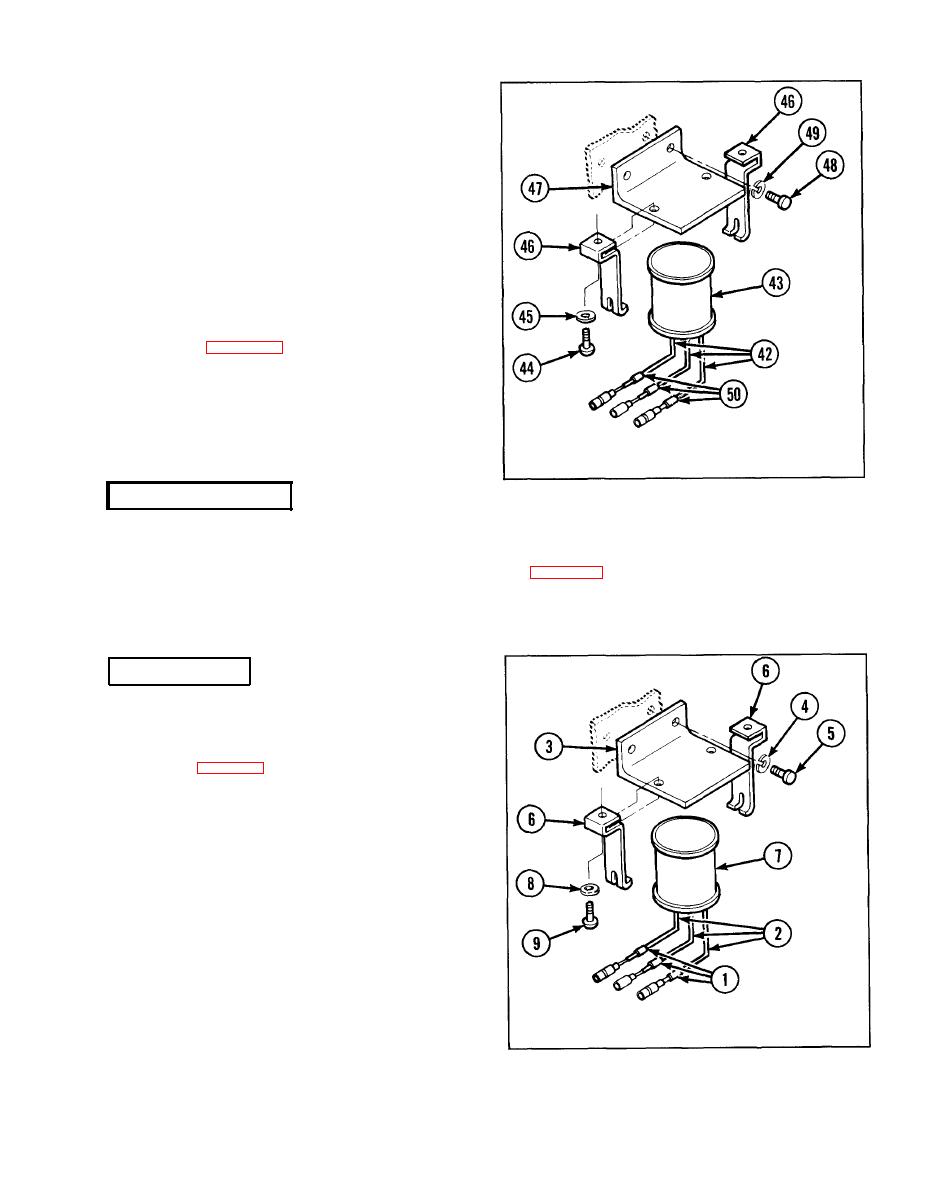
Disconnect
electrical
leads
(42)
from
rec-
tifier
(43).
Remove
two
machine
screws
(44),
two
30
flat washers (45), two level wind rec-
tifier mounting brackets (46), and rec-
tifier
(43)
from
level
wind
rectifier
sup-
port bracket (47).
Remove
two
hexagon
capscrews
(48),
31
two
(49),
and
level
wind
rectifier
support
bracket
(47).
Refer to page 2-66 for complete
32
disassembly
of
electrical
leads
(42).
If damaged, remove three marker bands
33
(50)
from
electrical
leads
(42).
INSPECTION/REPAIR
1 Inspect
for
broken,
damaged,
or
missing
parts.
2 Marker
bands
are
manufactured
items,
refer
to
3 Repair
is
by
replacement
of
authorized
parts
(TM
9-2350-238-24P-2).
INSTALLATION
1 If
necessary, install three new marker
bands (1) on electrical leads (2).
2 Refer
to
2-66
for
complete
reas-
sembly of electrical leads (2).
3 Install
level
wind
rectifier
support
bracket
(3) and secure with two new lockwash-
ers (4) and two hexagon capscrews (5).
4 Install two level wind rectifier mounting
brackets (6) and rectifier (7) on level
wind rectifier support bracket (3) and
secure with two flat washers (8) and
two machine screws (9).
5 Connect three electrical leads (2) to rec-
tifier (7).
|
|
Privacy Statement - Press Release - Copyright Information. - Contact Us |
