 |
|||
|
|
|||
|
|
|||
| ||||||||||
|
|
 TM 9-2320-269-34-1
CRANKSHAFT AND MAIN BEARINGS - CONTINUED
ACTION
LOCATION
ITEM
REMARKS
REMOVAL - CONTINUED
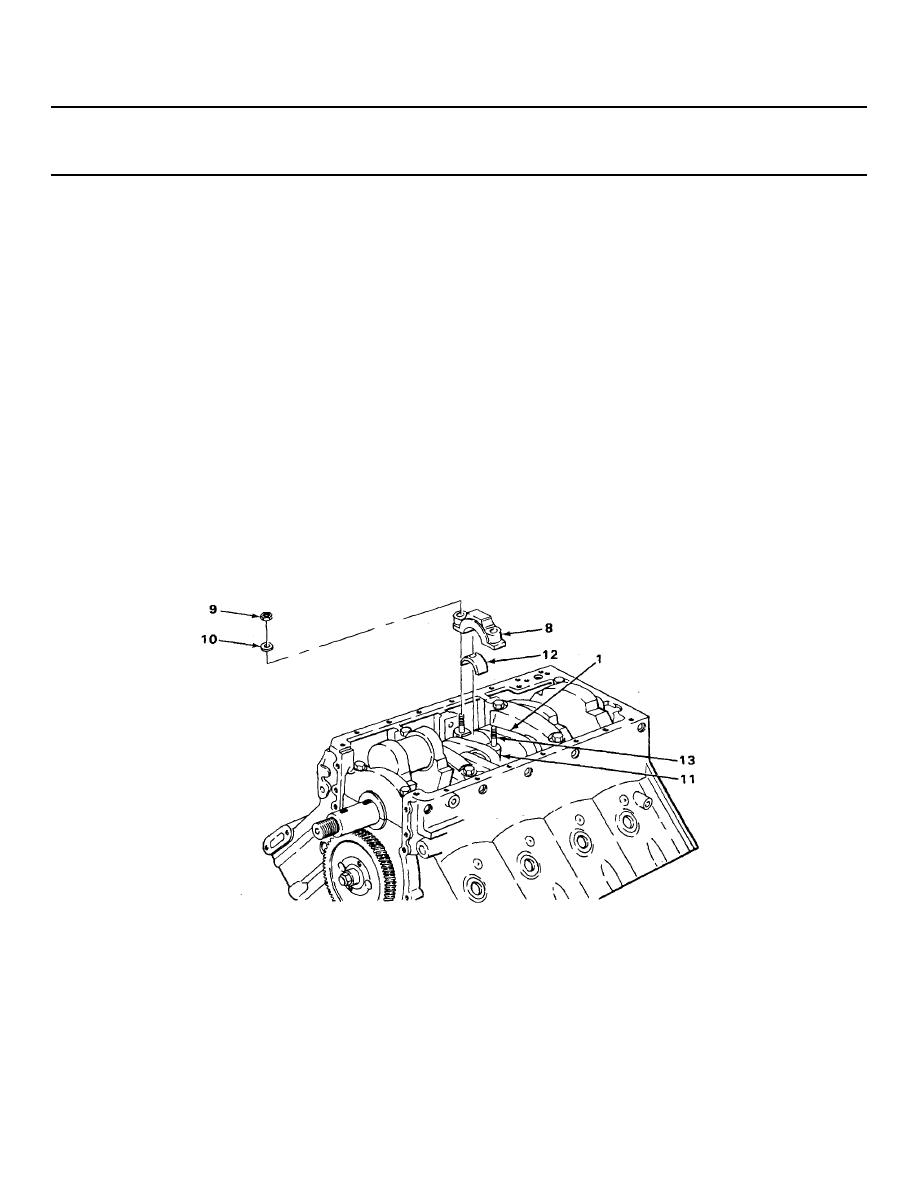
NOTE
Connecting rods and their bearing caps are numbered for proper placement during installation.
All connecting rod bearing caps and lower bearing shells come off the same way. One set is shown. Repeat
steps 8 thru 10 for each set.
8.
Connecting rod
Two nuts (9) and
a.
Using 2-inch open-end wrench, turn
bearing cap (8)
washers (10)
crankshaft (1) as necessary for access.
b.
Using 11/16-inch socket and ratchet
handle with 1/2-inch drive, unscrew
and take off.
9.
Connecting rod (11)
Connecting rod
a.
Using plastic-face hammer, tap to un-
and crankshaft (1)
bearing cap (8)
seat.
with lower bearing
b.
Take off.
shell (12)
Keep each cap and shell set together
for proper placement during
installation.
10.
Crankshaft (1)
Connecting rod (11)
Push away until connecting rod screws (13)
and attached parts
are clear of crankshaft.
TA237980
2-117
|
|
Privacy Statement - Press Release - Copyright Information. - Contact Us |
