 |
|||
|
|
|||
|
Page Title:
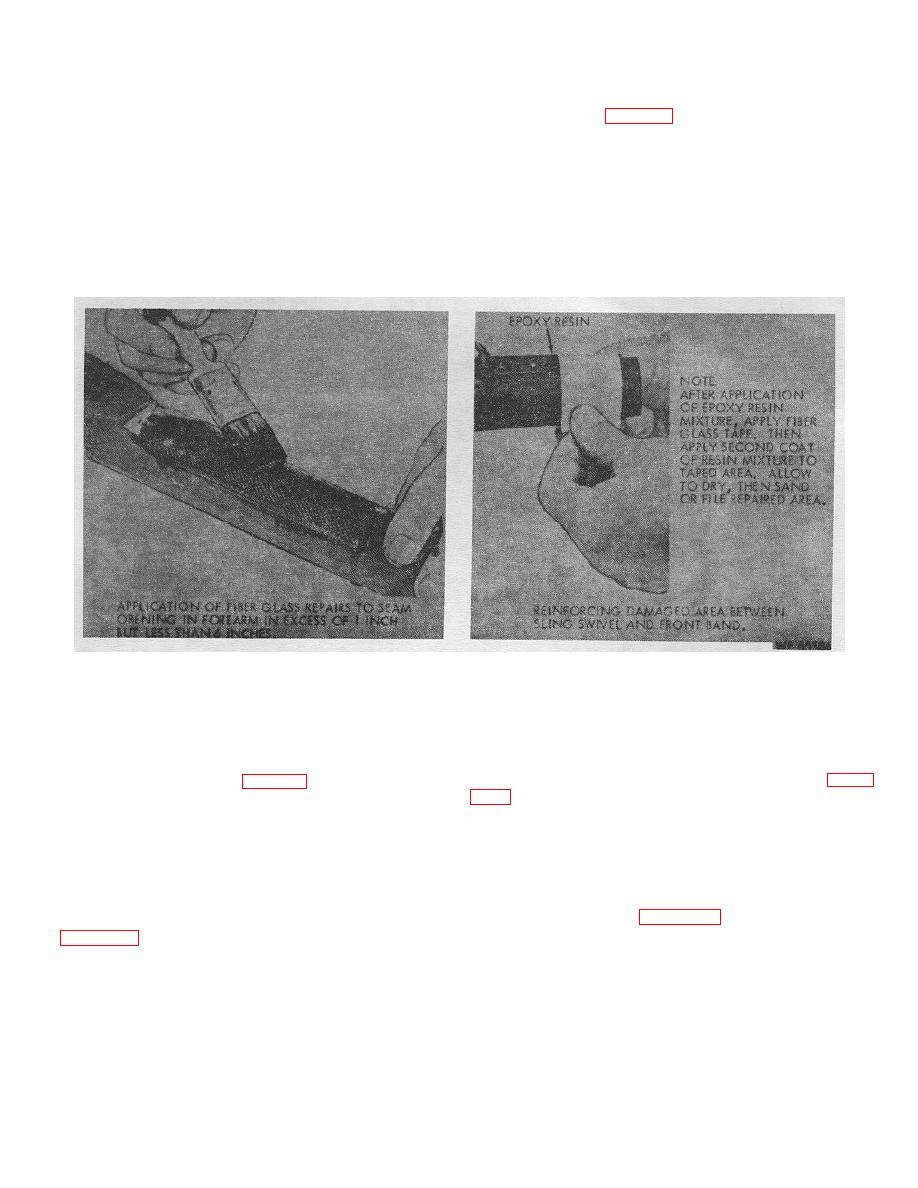
Figure 3-17. Repairing fiber glass/plastic stocks with epoxy adhesive and fiber glass tape (M14 Rifle). |
|
||
| ||||||||||
|
|
 TM 9-1005-301-30
mixture to the roughened area. Affix the fiber glass tape to
3-15.
Repair of Fiber Glass/ Plastic Stocks Using
the resined area (fig 3-17). Make certain the tape is
Fiber Glass Tape and Epoxy Resin (Upper Sling
thoroughly saturated with the resin mixture.
Swivel Area Front and Rear, M14 Only)
d. Allow the resin mixture to harden before removing
a. Cut the 1 inch fiber glass tape so that it
excess tape. Dress the rough edges with emery paper or a
extends approximately 1/2 inch on each side of the
file to blend with the surrounding area.
stock.
b. Roughen the immediate area to be covered by
NOTE
the tape using at least 80 Grit Emery Paper.
To facilitate the hardening of mixture, infrared
c. Mix epoxy resin and the hardener; apply the
heat lamps may be used.
Figure 3-17. Repairing fiber glass/plastic stocks with epoxy adhesive and fiber glass tape (M14 Rifle).
(4) Mix resin and hardener of epoxy adhesive in
3-16.
Repair of Plastic Stocks and Hand Guards
accordance with manufacturer's directions.
with Epoxy Adhesive (M16, M16A1 Rifles)
(5) Using a spatula, putty knife or screwdriver
a. Stock assemblies that contain gouges, dents,
blade, apply adhesive to area being repaired (step 1, figure
punctures and crushed areas (fig. 3-15) can be repaired
using the procedures indicated below:
eliminate air bubbles which may
be trapped under adhesive.
NOTE
(6) Allow approximately one hour to harden
Remove all dirt and grease from the stock
(cure), depending upon climate conditions.
assembly prior to repair. Use dry cleaning
(7) Using a flat medium cut file or No. 80 grit
solvent (SD), if necessary.
emery paper, remove the excess adhesive until flush with
the stock surface (step 3, figure 3-18).
(1) Stock assemblies damaged as indicated
(8) Apply approved black lacquer to repaired
in figure 3-10 will be replaced.
area.
(2) Remove plastic from the damaged area
exposing the styrofoam filler.
NOTE
(3) Slightly undercut the edges of the
In some cases it may be necessary to paint the
damaged plastic to permit the adhesive to expand under
entire stock to achieve an uniform appearance.
the edges of the area being repaired.
23
|
|
Privacy Statement - Press Release - Copyright Information. - Contact Us |
