 |
|||
|
|
|||
|
|
|||
| ||||||||||
|
|
 TM 9-2330-202-14&P
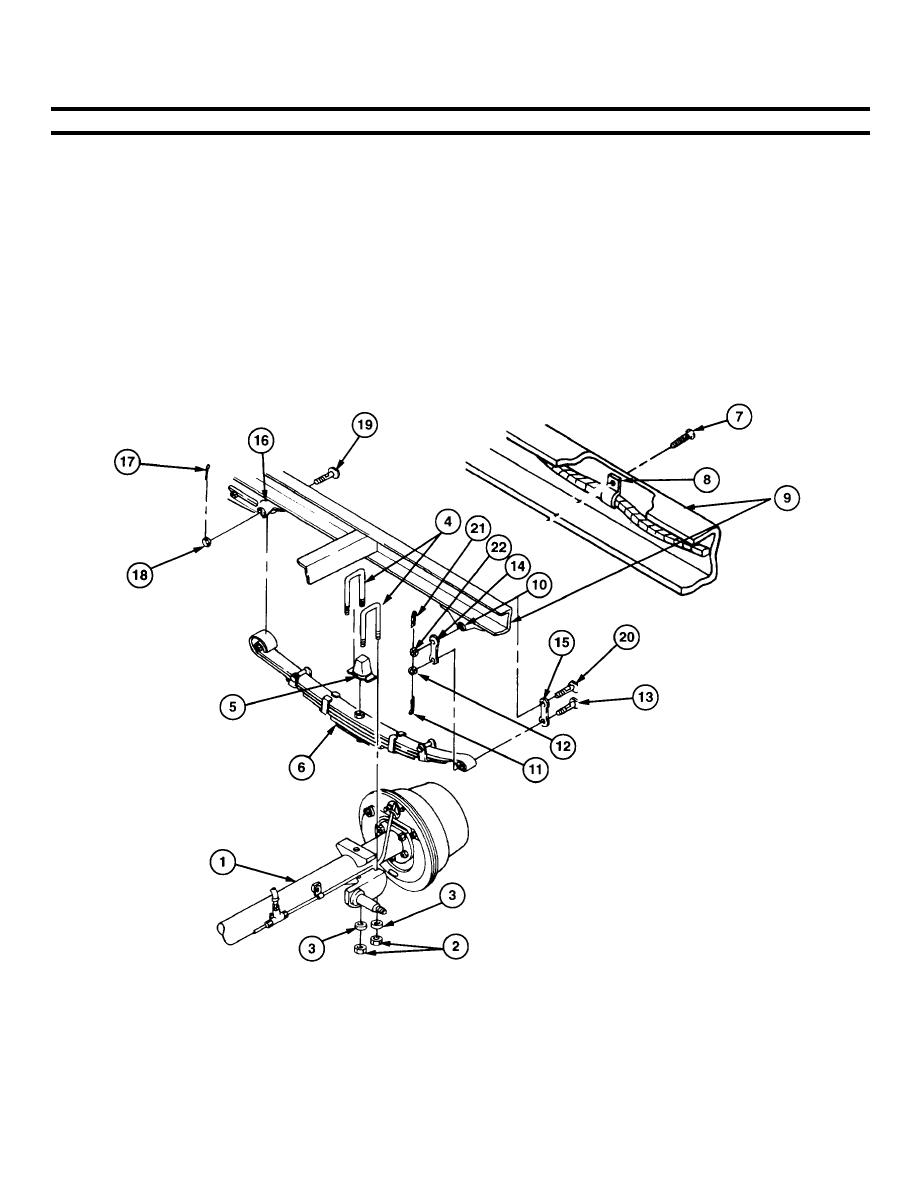
4-54.
SPRING ASSEMBLY REPLACEMENT (continued).
5. Lower axle (1) approximately 4 inches (10 cm) to take weight off spring assembly (6).
6. At rear spring hanger (10), remove cotter pin (11), slotted nut (12), and shackle pin (13) from two shackles (14 and 15)
and, with the aid of an assistant, remove spring assembly (6). Discard cotter pin.
7. At front spring hanger (16), remove cotter pin (17), slotted nut (18), and shackle pin (19) from front spring hanger (16)
and spring assembly (6). Discard cotter pin.
8. Remove spring assembly (6) from frame (9).
NOTE
Shackle pin should fit in rear spring hanger with slight resistance.
9. At rear spring hanger (10), check play between shackle pin (20) and rear spring hanger (10). Looseness indicates a
damaged shackle pin (20) inside rear spring hanger (step 11).
10. Remove cotter pin (21), slotted nut (22), shackle pin (20), and two shackles (14 and 15) from rearspring hanger (10).
Discard cotter pin.
4-105
|
|
Privacy Statement - Press Release - Copyright Information. - Contact Us |
