 |
|||
|
|
|||
|
|
|||
| ||||||||||
|
|
 TM 9-2320-269-34-1
ACTION
LOCATION
ITEM
REMARKS
REMOVAL
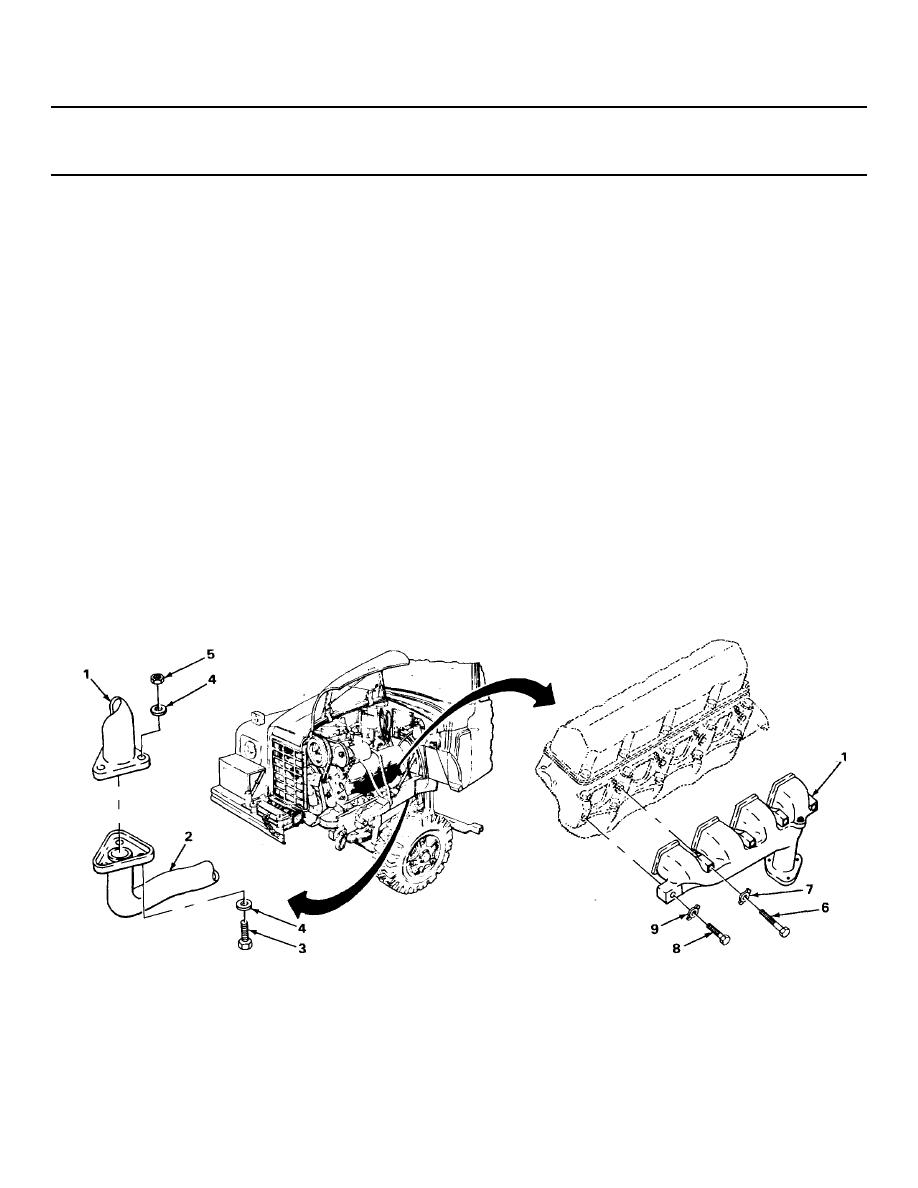
NOTE
If engine has been removed from vehicle and mounted on overhaul stand, skip steps 1 and 2 and
begin removal at step 3.
1.
Exhaust manifold (1)
Three screws (3),
Using 9/16-inch deep well socket, ratchet
and exhaust pipe (2)
six washers (4),
handle with 1/2-inch drive, 6-inch exten-
and nuts (5)
sion, and 9/16-inch open-end wrench, un-
screw and and take out.
2.
Exhaust manifold (1)
Exhaust pipe (2)
Move away from.
3.
Three screws (6)
a. Using 3/8-inch flat-tip screwdriver,
and lock plates (7)
flatten tab.
b. Using 3/4-inch socket and ratchet
handle with 1/2-inch drive, unscrew
and take out.
c. Get rid of lockplates (7).
4.
Two screws (8) and
a. Using 3/8-inch flat-tip screwdriver,
lock plates (9)flatten tab.
b. Using 9/16-inch deep well socket and
ratchet handle with 1/2-inch drive,
unscrew and take out.
c. Get rid of lock plates (9).
TA238050
2-233
|
|
Privacy Statement - Press Release - Copyright Information. - Contact Us |
