 |
|||
|
|
|||
|
|
|||
| ||||||||||
|
|
 TM 9-2320-269-34-1
ROCKER ARMS - CONTINUED
ACTION
LOCATION
ITEM
REMARKS
INSPECTION/REPLACEMENT/REPAIR
NOTE
For more information on how to inspect parts, go to General Maintenance Instructions (page 2-46).
Replace damaged or defective parts as needed.
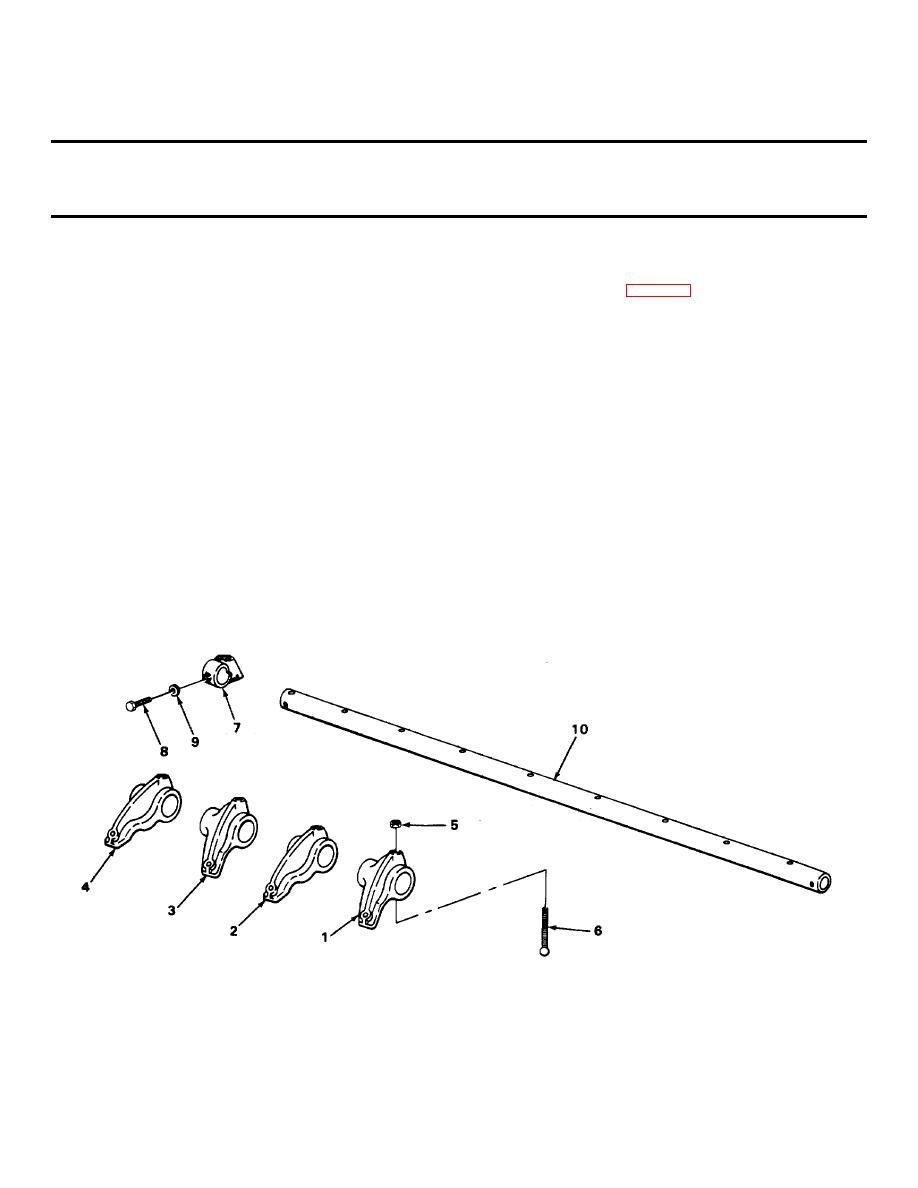
9.
Rocker arm
a. Look for cracks, break s, and bends.
shaft (10)
b. Look for wear from rocker arms.
10.
Eight rocker arms
a. Look at contact pad surface for wear
(1), (2), (3),
from valve caps.
and (4)
b. If pad is worn, resurface pad using
emery cloth but do not remove more
than 0.0010 inch (0.025 mm) of
material.
c. Look for scoring and wear in bores.
d. Using Inside micrometer check inside
diameter.
Diameter must be 0.8661 - 0.860 inch
(21.999 - 22.022 mm).
e. Using ribbon gage, check rocker arm-
to-shaft running clearance.
Clearance must be 0.0011 - 0.0045
Inch (25.286 - 25.298 mm).
TA238010
2-167
|
|
Privacy Statement - Press Release - Copyright Information. - Contact Us |