 |
|||
|
|
|||
|
Page Title:
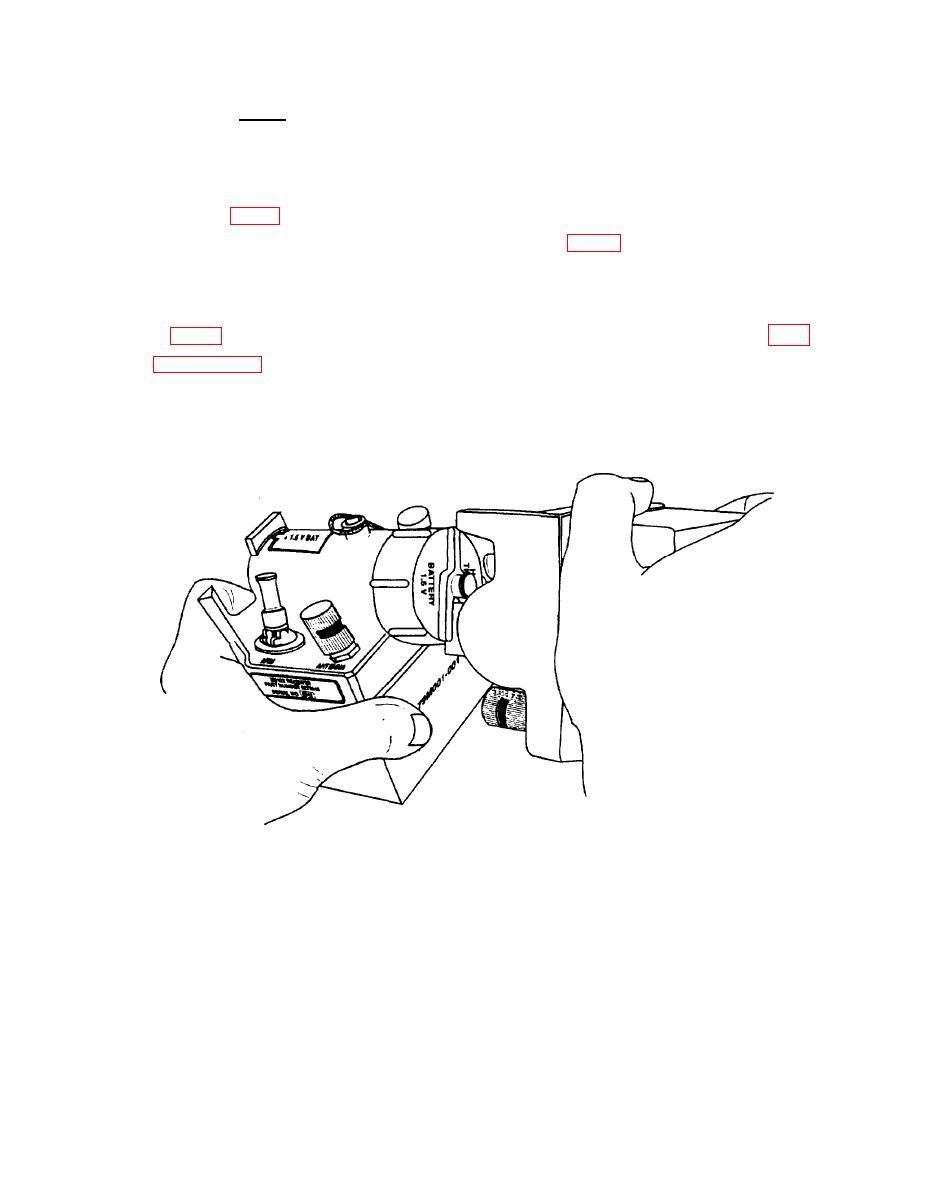
Figure 3-2. Removing tight battery cap using the second receiver as wrench. |
|
||
| ||||||||||
|
|
 TM 9-1375-213-12-3
TO 11A20-15-1
(5) Clean the battery contacts inside
NOTE
the receiver battery compartment with a clean,
dry rag.
If cap cannot be removed by hand,
insert the protruding flange of a second
(6) If a new battery is being installed,
compartment into
receiver's battery
wipe its contacts with a clean rag.
the slot of the tight battery cap and use
the second receiver as a wrench to
(7) Check polarity markings on battery
loosen the cap (fig. 3-2).
and insert positive (+) end first into battery
compartment (fig. 3-4).
(8) Thread battery cap onto battery
(3) Turn receiver to allow old battery
compartment and screw it on until a resistance
to drop out if one is present.
is felt. Turn the battery cap clockwise approxi-
mately one more turn to the white index mark
(4) Clean the battery's contacts with a
located on top of the battery compartment (fig.
clean rag (fig. 3-3). If the battery's contacts are
3-4) to assure contact.
very dirty corroded, or covered with a film,
refer to paragraphs 3-4 and 3-5 for replacement
criteria and cleaning instructions.
u
AR 102255
Figure 3-2. Removing tight battery cap using the second receiver as wrench.
3-4
|
|
Privacy Statement - Press Release - Copyright Information. - Contact Us |
