 |
|||
|
|
|||
|
Page Title:
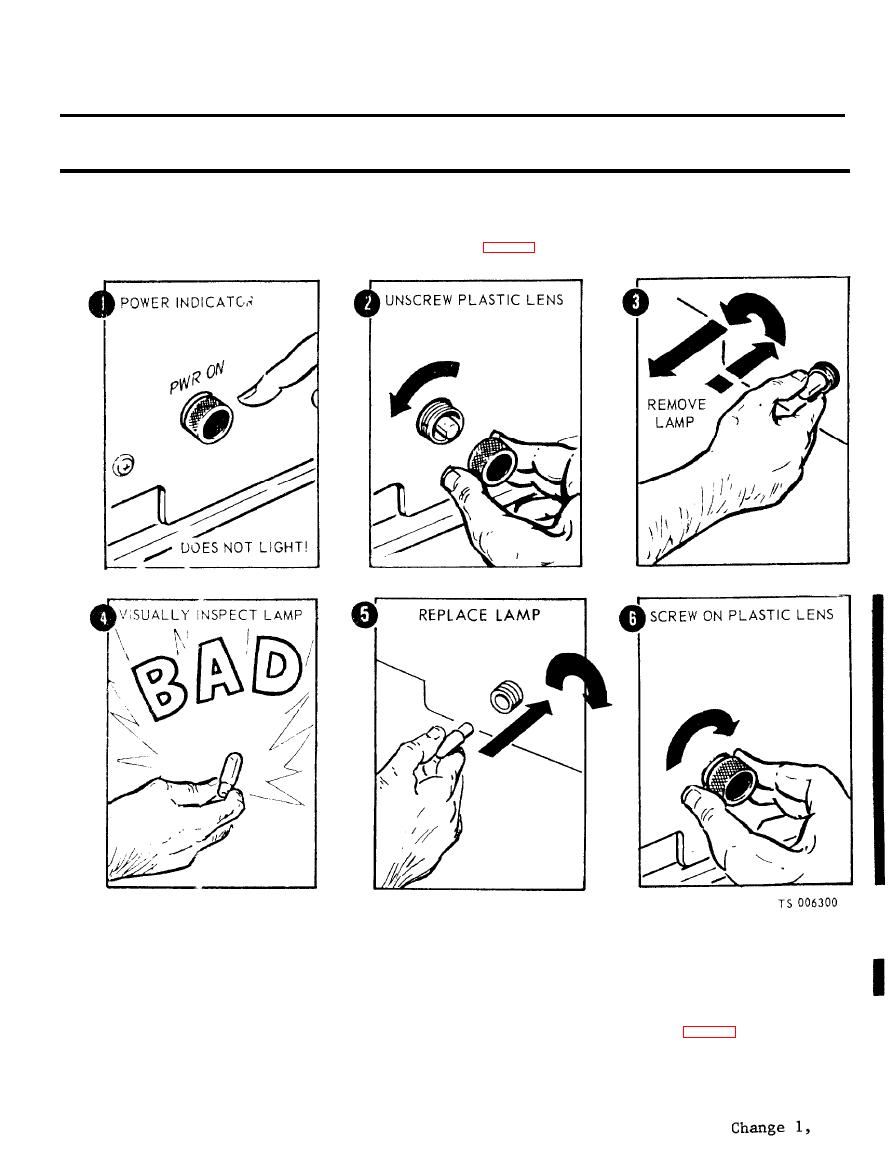
Figure 2-61. Removal of BRAKE ON indicator lamp. |
|
||
| ||||||||||
|
|
 TM 5-6675-250-34
Table
2-1.
TroubleshootingContined
MALFUNCTION
TEST OR INSPECTION
CORRECTIVE ACTION
(2). Install electronic control panel
assembly in case and secure with eight captive screws.
11. BRAKE ON INDICATOR FAILS TO LIGHT WHEN MODE SELECT SWITCH IS PLACED TO BRAKE ON.
Step 1. Check for a bad BRAKE ON indicator lamp.
b. Remove the lamp from the socket and visually inspect lamp for a burned out filament.
Replace a lamp.
Screw the plastic lens in place over the lamp and tighten the plastic lens finger tight.
Step 2. Inspect printed circuit board for evidence of damage or failed components.
a. Loosen the eight captive screws and lift the electronic control panel assembly from the case (fig. 2-62).
b. Unfasten ten screws securing the printed circuit board to the mounting brackets and loosen the
board to obtain access to electrical connectors.
2-51
|
|
Privacy Statement - Press Release - Copyright Information. - Contact Us |