 |
|||
|
|
|||
|
|
|||
| ||||||||||
|
|
 KEY to figure 5-2
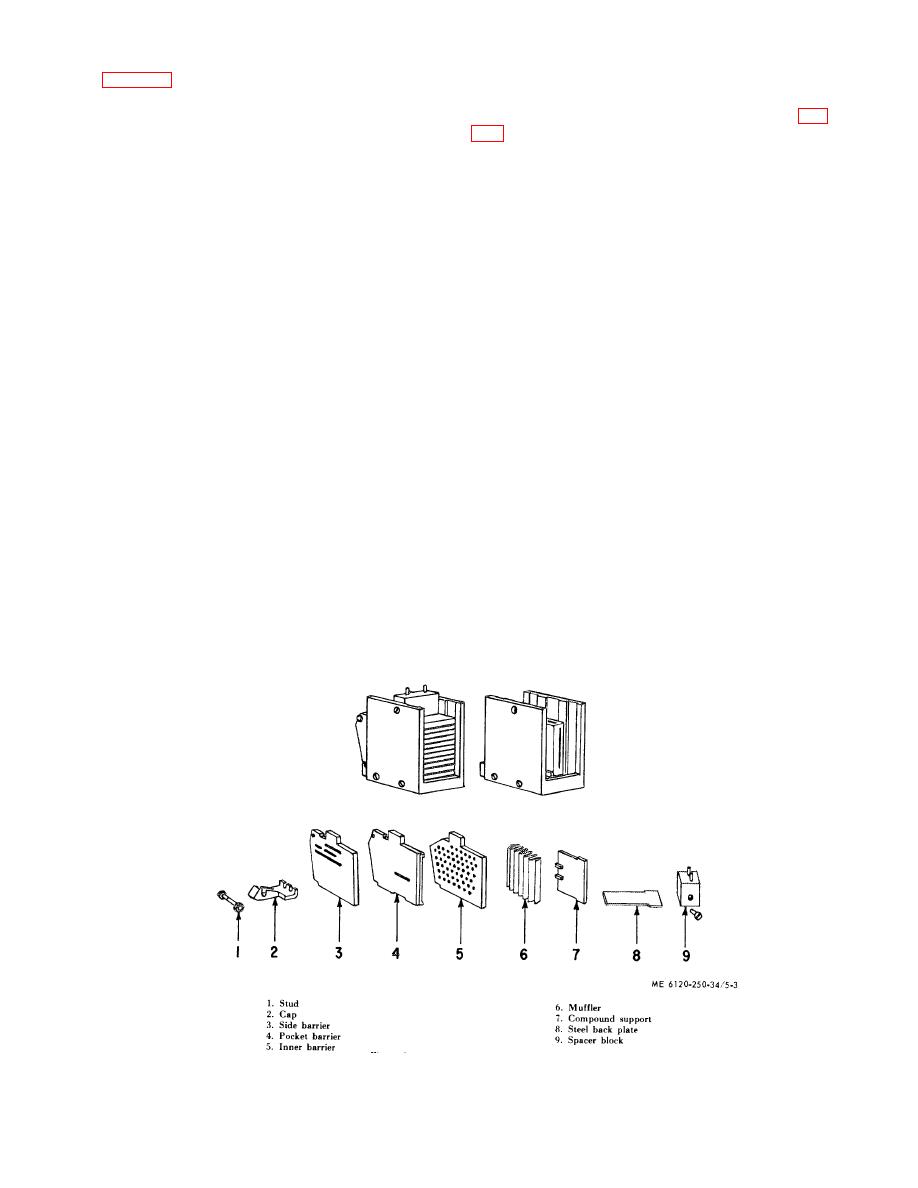
5-12. Arc Quencher Disassembly
1. Stop
a. Remove arc quenchers.
2. Screw
3. Stationary main contact
4. Pin (stationary main contact)
c. Remove spacer block steel back plate (8) and
5. Leaf spring (stationary main contact)
compound support (7).
6. Upper stud
7. Spring (stationary arcing contact)
barriers (5) can now be removed for inspection.
8. Spring (stationary main contact)
e. Remove nut and withdraw stud (1).
9. Contact stop
f. Remove cap (2). The side barrier (3) and pocket
10. Side link
barriers (4) should be free.
11. Pin (main arcing contact)
g. Reassemble and replace the arc quencher in
12. Pin (main movable contact)
reverse order. Tighten the fastenings after
13. Spring (main movable contact)
replacement.
14. Pole unit base
15. Lower stud
16. Clevis pin
17. Clevis
18. Link
19. Pin (side link)
20. Buffer spacer
21. Adjusting plate
22. Pin (insulating link)
23. Insulating link
24. Pin (arcing contact link)
25. Shouldered pin
26. Movable main contact
27. Stationary intermediate contact
28. Spring (leaf contact)
29. Movable arcing contact
30. Pin stationary arcing contact)
31. Stationary arcing contact
32. Screw
Figure 5-3. Arc quencher disassembly
5-7
|
|
Privacy Statement - Press Release - Copyright Information. - Contact Us |
