 |
|||
|
|
|||
|
Page Title:
CHAPTER 4 REPAIR OF TRANSFORMER |
|
||
| ||||||||||
|
|
 CHAPTER 4
REPAIR OF TRANSFORMER
Section I. TESTING
(b) A clear glass bottle in a lightproof carton.
(c) A one-quart tin can that has had the solder seams
4-1.Leak Test
Inspect the entire transformer for evidence of leaks and
CAUTION
make the following pressure test. Introduce dry nitrogen
Do not use rubber stoppers or rings
through the vent valve (located on the rear tank wall) until
(3) To clean the bottles, rinse with nonleaded,
the pressure in the transformer reaches 5 psi. Seal the
oil free gasoline. Then wash with strong soapsuds, rinse
tank at this pressure and make an examination for leaks
thoroughly with distilled water, and dry in an oven at
over a period of 12 hours. Leaks above the liquid level
1050C to 1100C for at least eight hours. After drying, the
can be located by applying a liquid soap solution to all
bottles must be tightly sealed with glass stoppers or with
gasket joints, pipe fittings, etc.
clean corks protected by clean metal foil. Store them in a
4-2. Tap Changer Test
dry, dust free cabinet or compartment.
The purpose of this test is to determine if the positions are
(4)
Carefully clean the sampling valve and
correct and the steps progress in accordance with the
allow enough insulating oil to run out so that any moisture
transformer nameplate. Apply a low voltage to one
or foreign matter which may have collected in valve and
winding (normally the high- voltage) and measure the
pipe is removed.
voltage on the other winding for each top changer
(5) Rinse the bottle carefully, at least three
position.
times, with small portions of liquid drawn from the
WARNINGS
sampling valve. Allow the sampling bottle to drain
The turns ratio must be taken into
thoroughly between rinses.
consideration when making this test, as
(6) Draw a sample into the bottle, leaving
voltages endangering operating personnel
sufficient air space to allow for possible expansion of the
may be present.
liquid. Reseal the transformer and carefully seal the
bottle to prevent exposure to the atmosphere.
4-3. Testing Insulating Oil for Moisture
(7) When making repeated samplings, observe
a. Handling Insulating Oil.
the transformer liquid level and add additional oil as
(1)
When handling insulating oil, use only
required.
metal or oil-proof synthetic rubber hose for oil lines. The
sulfur in natural rubber hose will dissolve in the oil and
prove harmful to the copper in the windings.
(2) In the sampling and testing of insulating oil,
strict attention should be given to cleaning and drying of
sampling and testing receptacles. Samples should be
taken when the oil is at least as warm as the surrounding
air to avoid the possibility of moisture condensation. If
the transformer is out of doors, the sample should be
taken to guard against contamination by blowing dust, etc.
b. Sampling from Transformer.
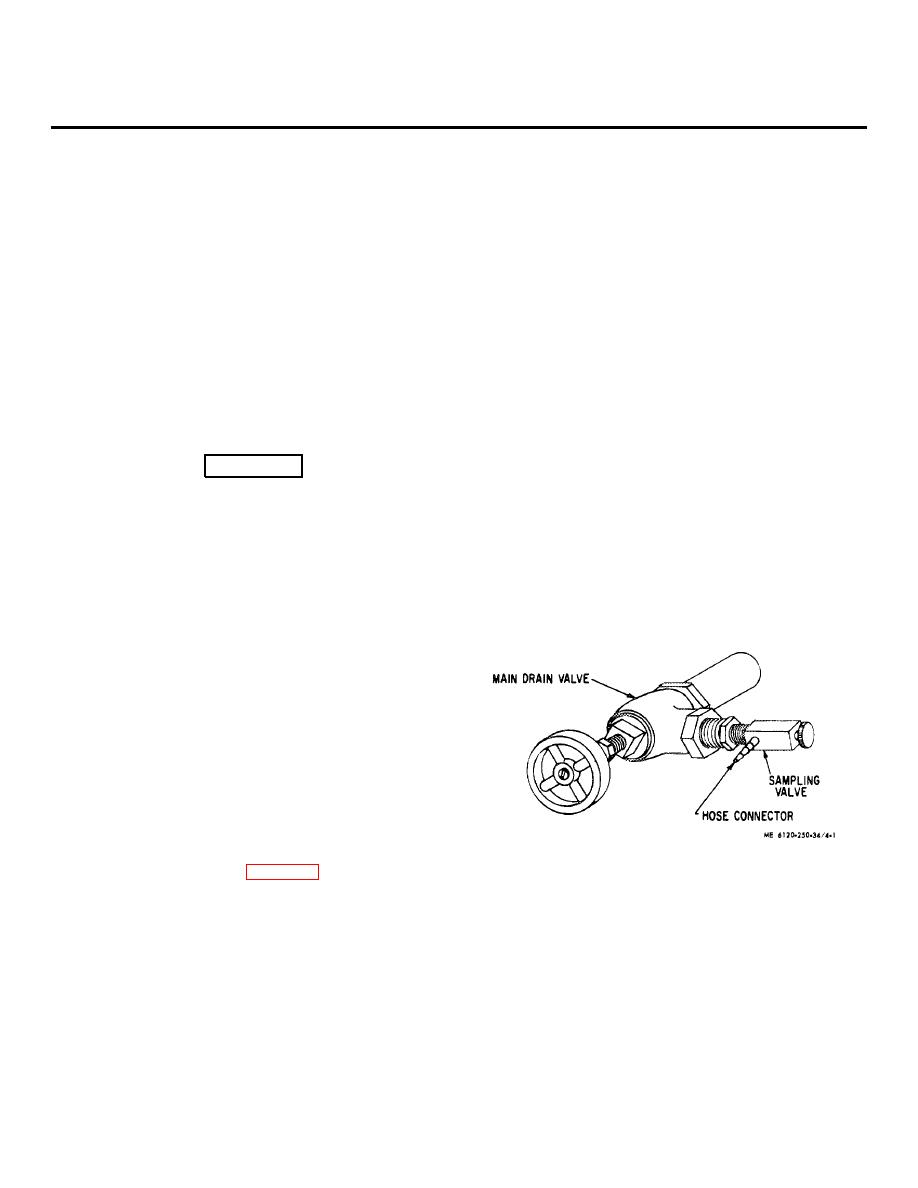
(I) Impurities which tend to affect the dielectric
strength of the oil will generally be found at the bottom of
the transformer, therefore the sampling valve is located
Figure 4-1. Transformer main drain valve.
on the main drain valve. See figure 4-1.
(2) Three types of containers are recommended for
c. Field Test for Moisture Content.
sampling purposes.
(I) Obtain a sample of the insulating oil when
(a) A one-quart small neck brown glass bottle.
4-1
|
|
Privacy Statement - Press Release - Copyright Information. - Contact Us |
