 |
|||
|
|
|||
|
|
|||
| ||||||||||
|
|
 TM 9-2320-360-20-2
16-8. HOOD ADJUSTMENT
This task covers:
a. Adjustment
b. Follow-On Maintenance
INITIAL SETUP
Equipment Conditions
Materials/Parts
Engine shut off (TM 9-2320-360-10).
Adhesive-Sealant (Item 6, Appendix C)
Parking brake on (TM 9-2320-360-10).
Locknuts (4) (Item 58, Appendix G)
Wheels chocked.
Locknuts (2) (Item 72, Appendix G)
Engine hood opened (TM 9-2320-360-10).
Lockwashers (4) (Item 101, Appendix G)
Lockwashers (2) (item 102, Appendix G)
Tools and Special Tools
Tool Kit, Genl Mech (Item 54, Appendix F)
Wrench, Torque, 0-175 Lb-Ft (Item 73,
Wrench, Torque, 0-200 Lb-In. (Item 72,
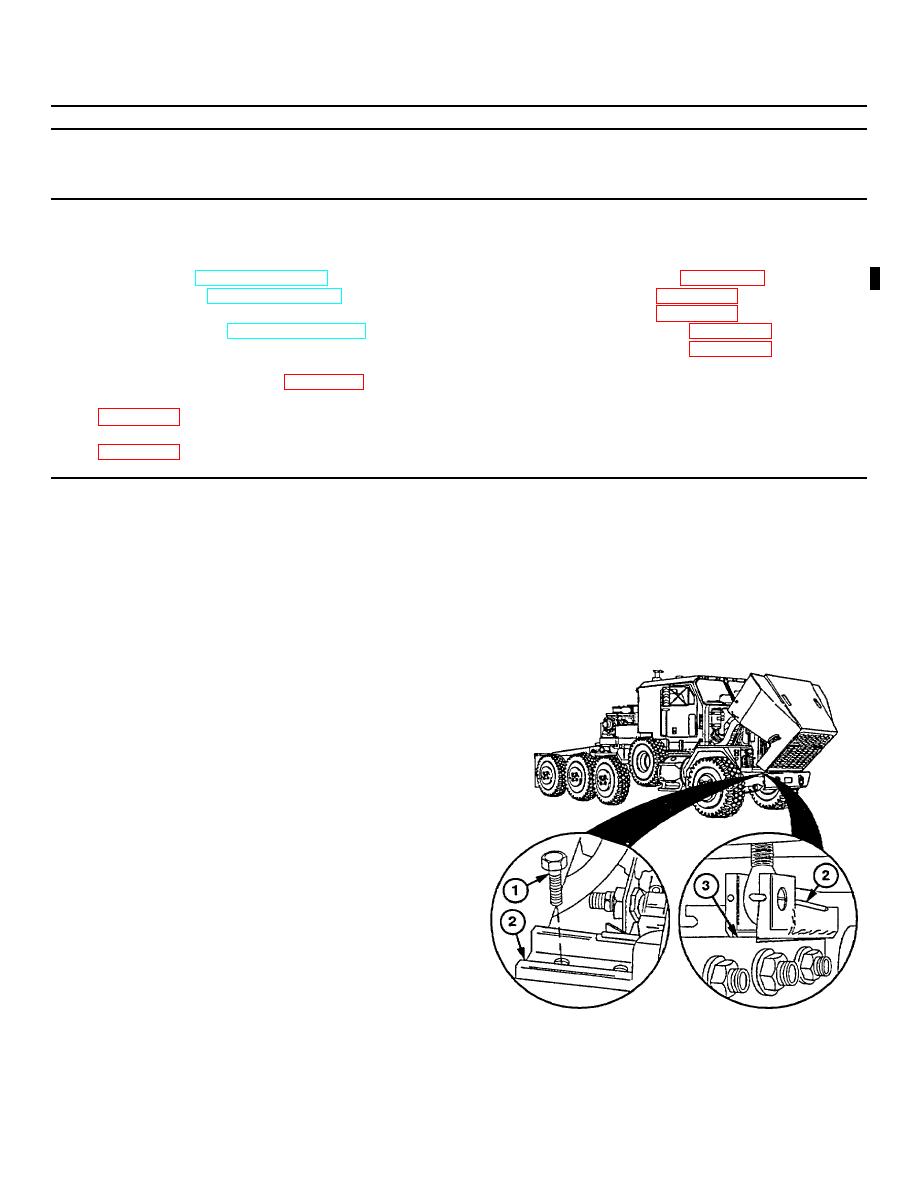
NOTE
To adjust hood position from front to rear, do steps (1) thru (5).
To adjust hood side support, do steps (6) thru (11).
To adjust hood position up or down at bumper, do steps (12) thru (15).
To adjust hood position up or down at cab, do steps (16) thru (20).
When hood is adjusted properly, it should be 1.5 in. (38 mm) above front fenders
and 1.5 in. (38 mm) from cab.
a. Adjustment
CAUTION
Do not attempt to adjust both hinge
brackets at the same time. Failure to
comply will result in hood being
unsupported. Damage to equipment
may result.
(1) Remove two screws (1) from bracket (2).
NOTE
Do not push hood bracket back more
than 0.5 in. (13 mm). Mounting screw
cannot be tightened if hood bracket
is pushed back too far.
(2) Position bracket (2) 0.5 in. (13 mm) from
machined lip (3).
Change 1 16-27
|
|
Privacy Statement - Press Release - Copyright Information. - Contact Us |
|
|
Integrated Publishing, Inc. - A (SDVOSB) Service Disabled Veteran Owned Small Business
|

