 |
|||
|
|
|||
|
Page Title:
PROPELLER SHAFT AND UNIVERSAL JOINT REPAIR |
|
||
| ||||||||||
|
|
 TM 9-2320-360-20-2
10-2. PROPELLER SHAFT AND UNIVERSAL JOINT REPAIR
This task covers:
a. Removal
d. Assembly
b. Disassembly
e. Installation
c. Cleaning/Inspection
f. Follow-On Maintenance
INITIAL SETUP
Equipment Conditions
Materials/Parts
Engine shut off (TM 9-2320-360-10).
Adhesive-Sealant (It em 6, Appendix C)
Parking brake on (TM 9-2320-360-10).
Grease, Automotive and Artillery (Item 17,
Wheels chocked.
Transfer case shift lever set to NEUTRAL
Solvent Dry Cleaning (Item 31, Appendix C)
(TM 9-2320-360-10).
Lockstraps, Transmission to Transfer Case,
Transfer Case to No. 2 Axle, and No. 2 Axle to
No. 3 Axle (12) (Item 85, Appendix G)
Tools and Special Tools
Tool Kit, Genl Mech (Item 54, Appendix F)
Lockstraps, Transfer Case to No. 1 Axle and No. 3
Compressor Unit, Air (Item 3, Appendix F)
Axle to No. 4 Axle (8) (Item 86, Appendix G)
Goggles, Industrial (Item 14, Appendix F)
Socket Wrench Set, 3/8 In. Drive (Item 45,
Personnel Required
Two
Wrench, Torque 0-175 Lb-Ft (Item 73,
CAUTION
Propshaft parts must not be rotated
from their original position during
reassembly. An indexing line should
be drawn down entire length of all
assemblies prior to removal. Failure
to comply may result in driveline
vibration and damage to equipment.
NOTE
These procedures are used for all
propeller shafts. Propeller shafts are
all removed, disassembled, cleaned
and inspected, assembled, and
installed the same way.
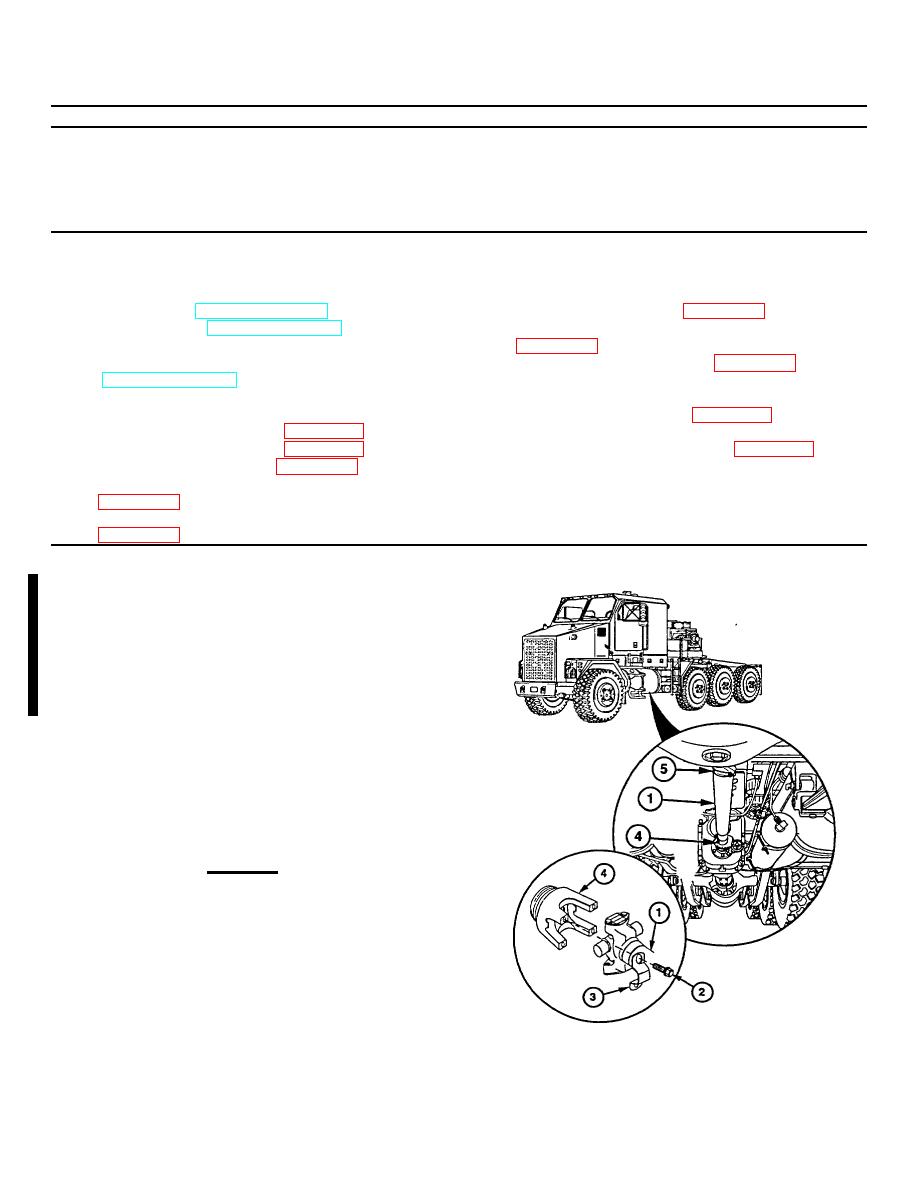
a. Removal
WARNING
Support
propeller
shaft
during
removal. Injury to personnel may
result if propeller shaft falls.
(1) Support propeller shaft (1) with lifting strap
and aid of assistant.
(2) Remove four capscrews (2) and two
bearing straps (3) from yoke (4).
(3) Repeat step (2) for yoke (5).
10-2 Change 1
|
|
Privacy Statement - Press Release - Copyright Information. - Contact Us |
|
|
Integrated Publishing, Inc. - A (SDVOSB) Service Disabled Veteran Owned Small Business
|

