 |
|||
|
|
|||
|
|
|||
| ||||||||||
|
|
 TM 9-2320-269-34-1
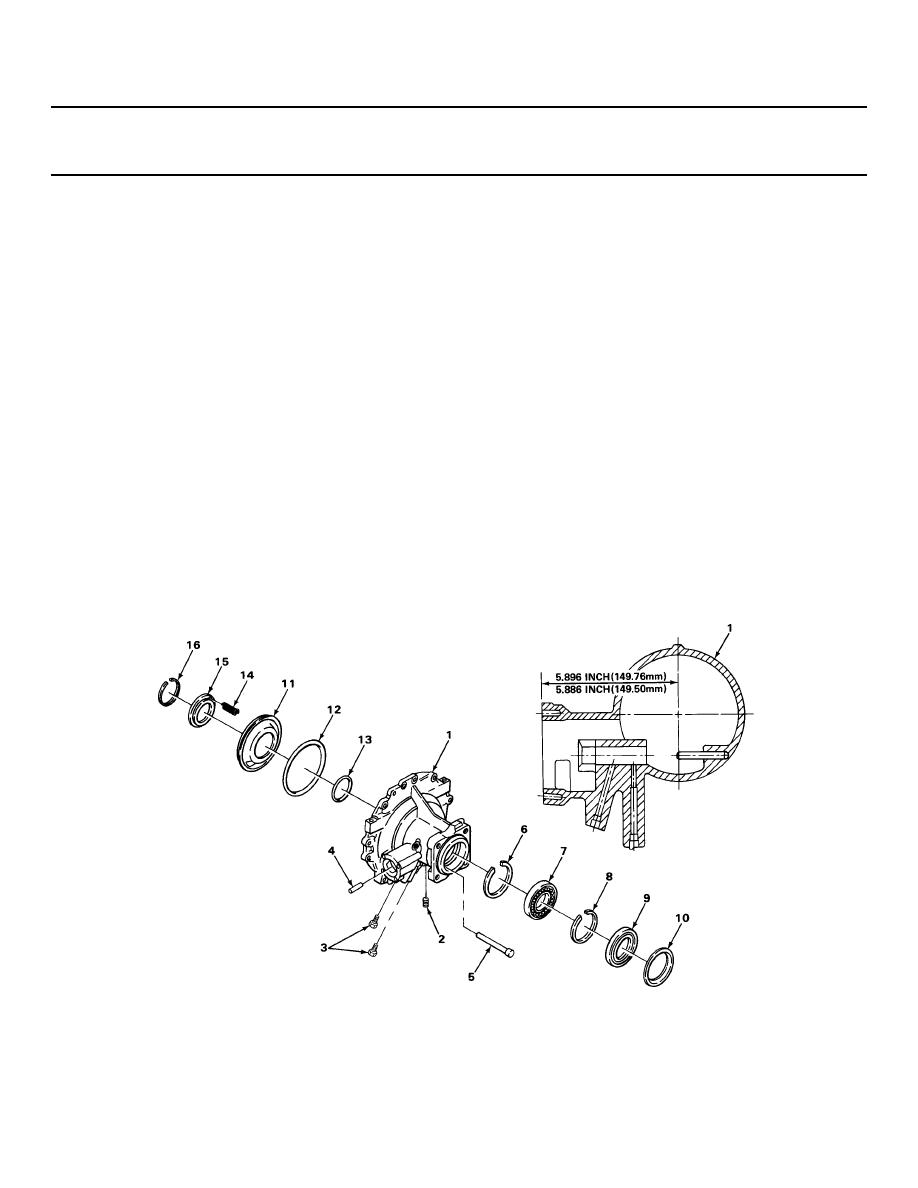
REAR COVER AND OUTPUT SHAFT - CONTINUED
ACTION
LOCATION
ITEM
REMARKS
ASSEMBLY - CONTINUED
35.
Output shaft dust
a.
Apply non-hardening sealing co mpound
shield (10)
to outer rim.
b.
Put in position.
c.
Put seal on dust shield installer, con-
cave side first.
d.
Using ball-peen hammer, drive seal in
until it is flush to 0.40-inch (1.02
mm) below the face of the bore.
36.
Low clutch
Two new packings
a.
Lubricate with oil soluble grease.
piston (11)
(12) and (13)
b.
With lips of packings facing rear of
piston (11), put on.
37.
Rear cover
Low clutch
Put in carefully.
assembly (1)
piston (11)
Lips of seals must not be folded.
38.
Low clutch
26 springs (14)
Put in position.
piston (11)
39.
Spring retainer (15)
Using low and first clutch compressor,
depress below snapring groove in
rear cover assembly (1).
40.
Rear cover
Snapring (16)
Using 3/8-inch flat-tip screwdriver, put
assembly (1)
in.
TA238472
2-777
|
|
Privacy Statement - Press Release - Copyright Information. - Contact Us |
