 |
|||
|
|
|||
|
|
|||
| ||||||||||
|
|
 TM 9-2330-202-14&P
4-57.
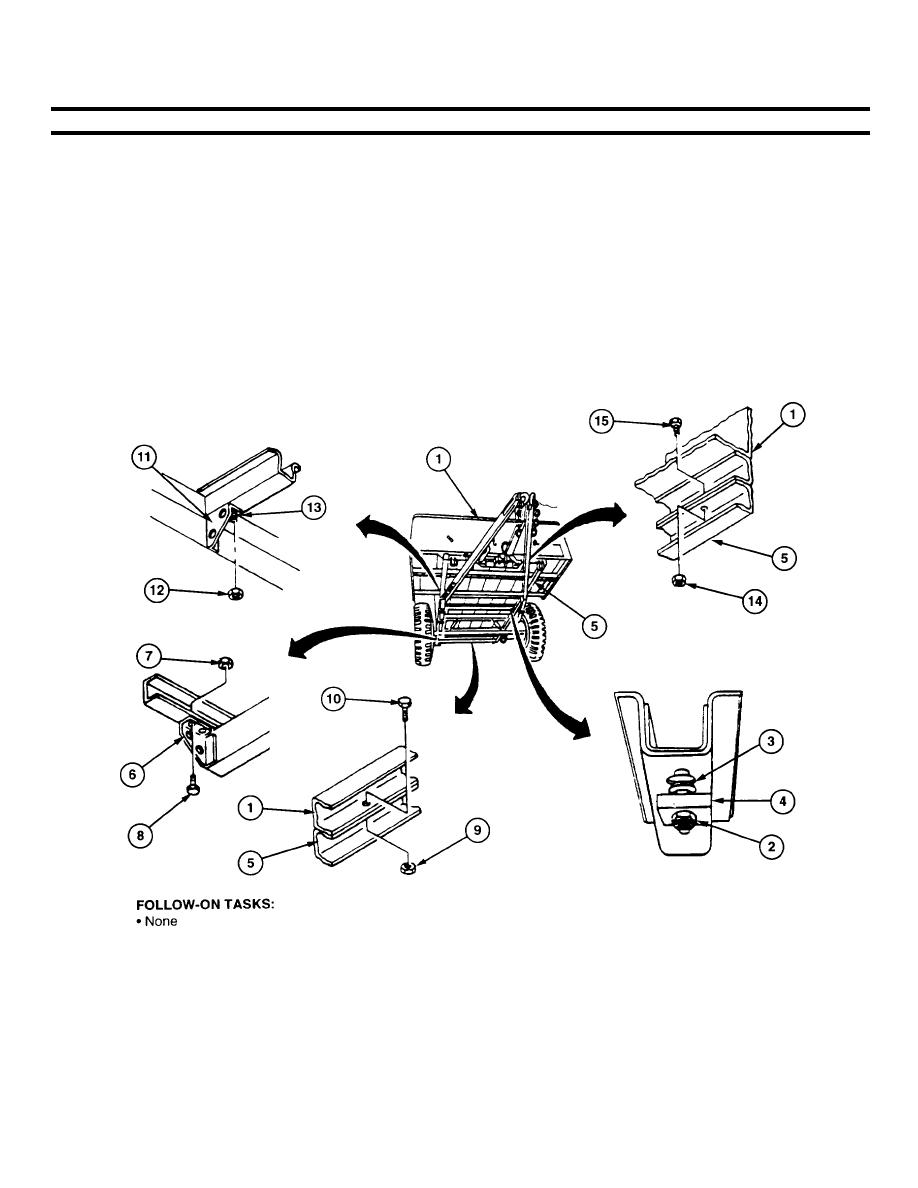
CARGO BODY REPLACEMENT (M101A2 AND M101A3) (continued).
b.
INSTALLATION
1.
Attach a suitable lifting device to cargo body (1).
2.
With the aid of an assistant, lift cargo body (1) onto frame (5) and align mounting holes.
3.
At front chassis sill, loosely install three capscrews (15) and new self-locking nuts (14) on cargo body (1) and frame (5).
4.
At each of two midchassis mounting brackets (11 ), loosely install capscrew (13) and new self-locking nut (12) on
mounting brackets (11).
5.
At rear chassis sill, loosely install capscrew (10) and new self-locking nut (9) on cargo body (1) and frame (5).
6.
At each of two rear corner mounting brackets (6), loosely Install two capscrews (8) and new self-locking nuts (7) on
mounting brackets (6).
7.
Insert eight square neck bolts (3), clamps (4), and new self-locking nuts (2) into cargo body (1).
8.
Torque 18 self-locking nuts (14, 2, 9, 7, and 12) between 26 and 31 Ib-ft (35-42 Nm).
9.
Remove lifting device from cargo body (1).
4-112
|
|
Privacy Statement - Press Release - Copyright Information. - Contact Us |
