 |
|||
|
|
|||
|
|
|||
| ||||||||||
|
|
 TM 9-2330-202-14&P
447.
SPRING HANGER REPLACEMENT (continued).
NOTE
Remove bushing only if damaged.
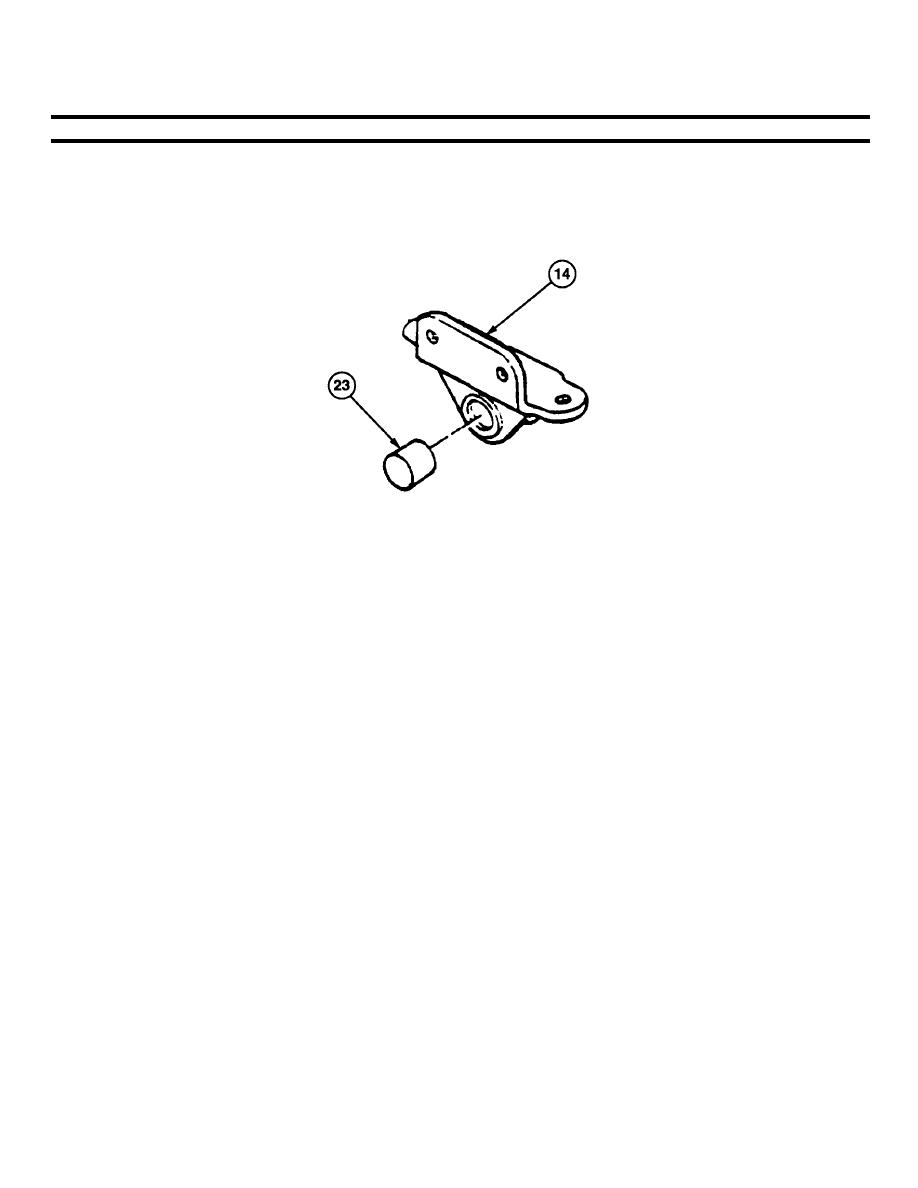
6. Remove bushing (23) from rear spring hanger (14).
c. CLEANING AND INSPECTION
c.
CLEANING AND INSPECTION
WARNING
Drycleaning solvent P-D-680 is toxic and flammable. Always wear protective goggles and gloves,
and use only in a well-ventilated area. Avoid contact with skin, eyes, and clothes, and DO NOT
breathe vapors. DO NOT use near open flame or excessive heat.
1. Clean all removed components with drycleaning solvent and rag and allow to dry. Make sure lubrication passages in
shackle pins are free of grease.
2. Inspect all removed components for cracks, breaks, corrosion, and damaged threads. Replace if damaged.
d. REAR SPRING HANGER INSTALLATION
1. If removed, install bushing (23) in rear spring hanger (14).
2. Install rear spring hanger (14) on frame (13) with four capscrews (22), washers (21), and new self-locking nuts (20).
Torque self-locking nuts to 30 Ib-ft (41 Nm).
3. Use floor jack to raise vehicle until shackle (18) is aligned with rear spring hanger (14).
4. Install shackle pin (17) through shackle (18) and rear spring hanger (14).
5. Install slotted nut (16) on shackle (18) and tighten. Install new cotter pin (15) on shackle (18).
6. Install new lubrication fitting (19) in shackle pin (17).
7. Remove support from rear comer of vehicle. Remove floor jack from under vehicle.
4-95
|
|
Privacy Statement - Press Release - Copyright Information. - Contact Us |