 |
|||
|
|
|||
|
|
|||
| ||||||||||
|
|
 TM 9-2320-360-20-2
6-5. THERMOSTAT REPLACEMENT
This task covers:
a. Removal
c. Installation
b. Cleaning/Inspection
d. Follow-On Maintenance
INITIAL SETUP
Equipment Conditions
Materials/Parts
Cooling system drained (para 6-2).
Adhesive-Sealant, Silicone (Item 3, Appendix C)
ECM removed (para 7-29 or para 7-29.1).
Compound, Sealing, Pipe Thread (Item 15,
Solvent, Dry Cleaning (Item 31, Appendix C)
Tools and Special Tools
Tool Kit, Genl Mech (Item 54, Appendix F)
Ties, Cable, Plastic (Item 34, Appendix C)
Compressor Unit, Air (Item 3, Appendix F)
Clamps (2) (Item 13, Appendix G)
Goggles, Industrial (Item 14, Appendix F)
Gasket, Thermostat, Left (Item 41, Appendix G)
Handle, Installer (Item 15, Appendix F)
Gasket, Thermostat, Right (Item 42, Appendix G)
Installer, Thermostat Seal (Item 16, Appendix F)
Lockwashers (7) (Item 96, Appendix G)
Wrench, Torque, 0-200 Lb-In. (Item 72,
Seals, Thermostat (2) (Item 166, Appendix G)
Wrench, Torque, 0-175 Lb-Ft (Item 73,
NOTE
Both thermostats should be replaced
at the same time.
a. Removal
WARNING
Coolant may be very hot and under
pressure from engine operation.
Ensure engine is cool before
performing maintenance. Failure to
comply may cause serious Injury.
NOTE
Steps (1) thru (12), (16), and (17) are
used to remove right thermostat.
Steps (4), (5), and (13) thru (17) are
used to remove left thermostat.
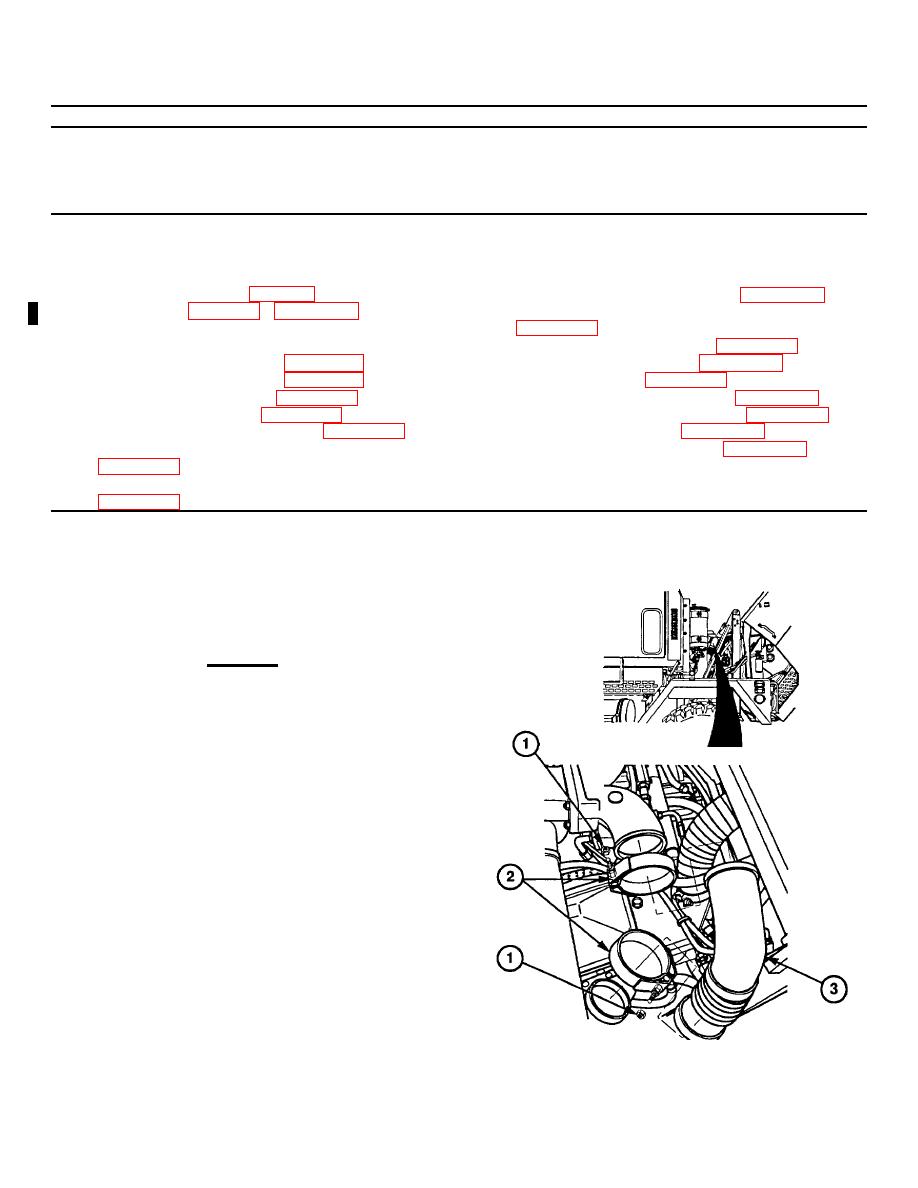
(1) Remove two locknuts (1) from clamps (2)
on exhaust tube (3). Discard locknuts.
(2) Remove two clamps (2) and exhaust tube
(3) from engine.
(3) Remove two clamps (2) from exhaust tube
(3). Discard clamps.
6-26 Change 3
|
|
Privacy Statement - Press Release - Copyright Information. - Contact Us |