 |
|||
|
|
|||
|
|
|||
| ||||||||||
|
|
 TM 9-2320-270-20-1
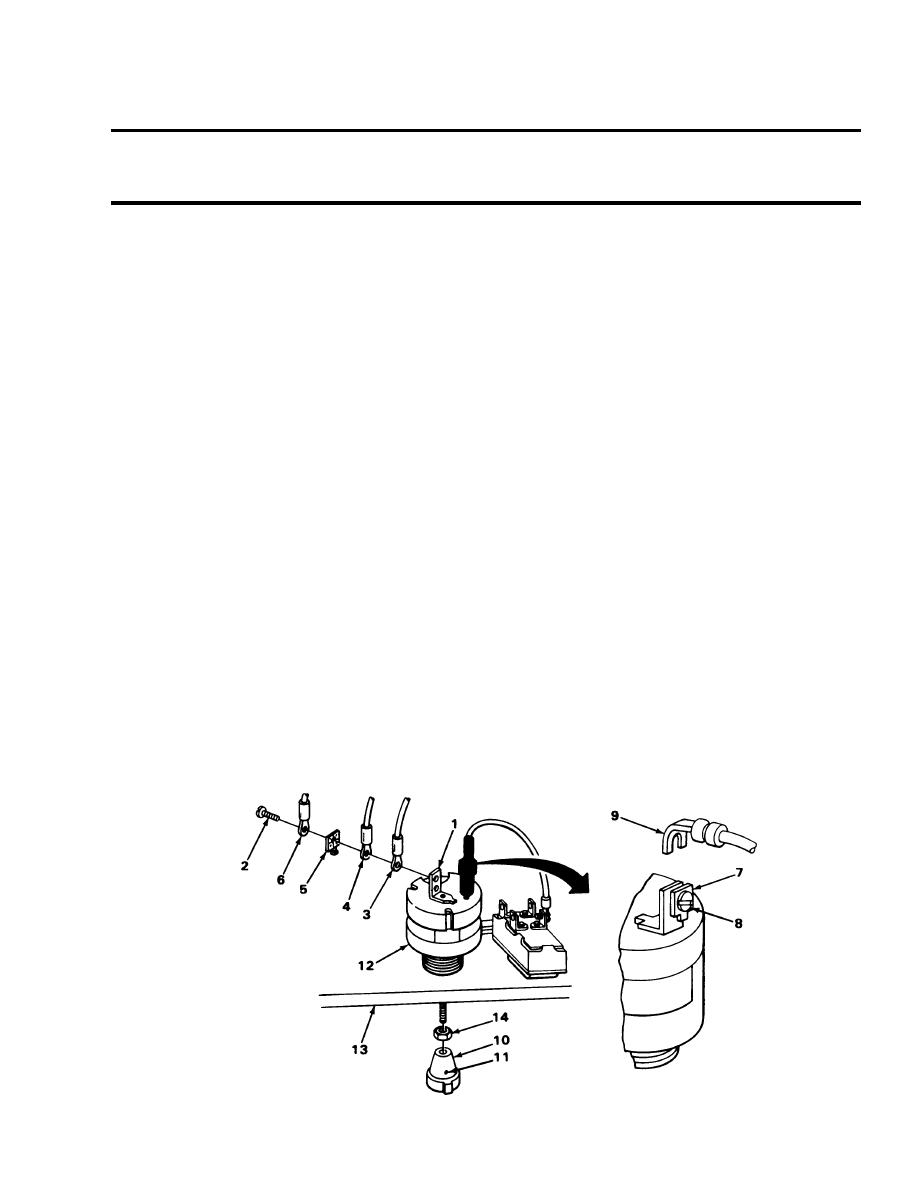
LIGHT CONTROL RHEOSTAT - CONTINUED
ACTION
LOCATION
ITEM
REMARKS
Nut (14)
Using wrench, unscrew and take out.
6. Light control
rheostat (12) to
instrument panel (13)
Light control
Take out.
7. Instrument
panel (13)
rheostat (12)
INSTALLATION
Put in.
8. Instrument
Light control
panel (13)
rheostat (12)
Screw on and tighten using wrench.
Nut (14)
9. Light control
rheostat (12)
Put on.
Knob (10)
10. Light control
rheostat (12)
Using 1/8-inch screwdriver, tighten.
Setscrew (11)
11. Knob (10)
Put on so that tab goes in hole.
Cream wire (3),
12. Screw (2)
black wire (4), tab
washer (5), and
wire 52 (6)
Screw (2)
13. Terminal (1)
Screw in and tighten using 1/4-inch
screwdriver.
Wire 52 (9)
Put in.
14. Terminal (7)
15.
Screw (8)
Using 1/4-inch screwdriver, tighten.
TA239993
4-287
|
|
Privacy Statement - Press Release - Copyright Information. - Contact Us |