 |
|||
|
|
|||
|
|
|||
| ||||||||||
|
|
 TM 9-2320-360-20-2
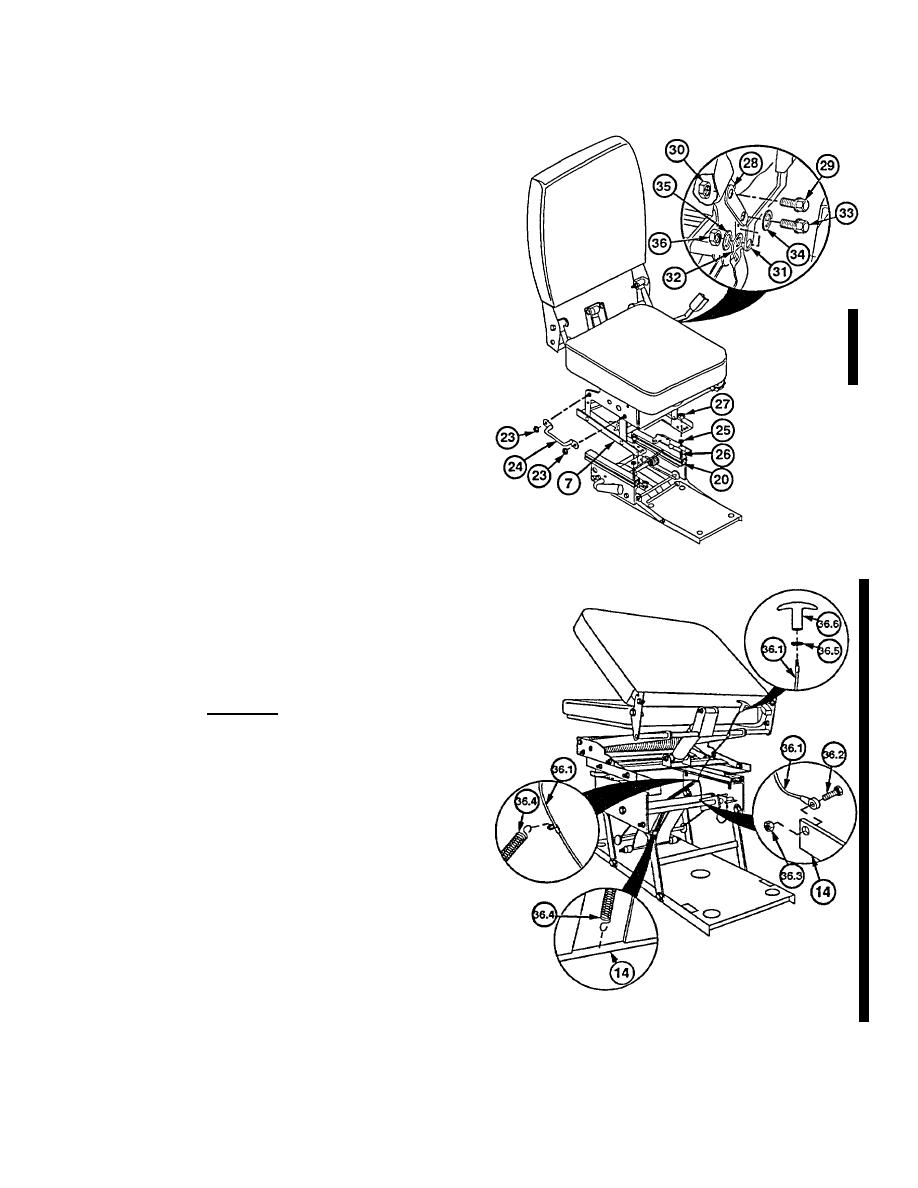
(11) Remove two locknuts (23) from seat frame
(7). Discard locknuts.
(12) Install grab handle (24) on seat frame (7)
with two new locknuts (23). Torque to 23
lb-ft (31 Nm).
(13) Place four washers (25) on studs (26).
(14) Position seat frame (7) on control track
(20) with aid of assistant.
(15) Install four new locknuts (27) on studs
(26).
(16) Install link (28) on doghouse side of seat
(10) with screw (29) and new locknut (30).
NOTE
Passenger's side has latch assembly
instead of seatbelt.
(17) Install latch (31) and anchor strap (32) on
doghouse side of seat (10) with screw
(33), washer (34), washer (35), and
locknut (36).
NOTE
Do not overtighten. Cable should be
able to pivot.
(17.1) Install cable (36.1) on seat support (14)
with screw (36.2) and new locknut (36.3).
(17.2) Install spring (36.4) on seat support (14).
(17.3) Install cable (36.1) on spring (36.4).
WARNING
Adhesive-sealant can burn easily,
can give off harmful vapors, and Is
harmful to skin and clothing. To
avoid Injury or death, keep away from
open fire and use In well ventilated
area. If adhesive sealant gets on skin
or clothing, wash Immediately with
soap and water.
(17.4) Coat threads of cable (36.1) with
adhesive-sealant.
(17.5) Route cable (36.1) thru seat frame and
install washer (36.5) and handle (36.6) on
cable.
Change 1 16-65
|
|
Privacy Statement - Press Release - Copyright Information. - Contact Us |
|
|
Integrated Publishing, Inc. - A (SDVOSB) Service Disabled Veteran Owned Small Business
|

