 |
|||
|
|
|||
|
|
|||
| ||||||||||
|
|
 TM 9-2320-360-20-2
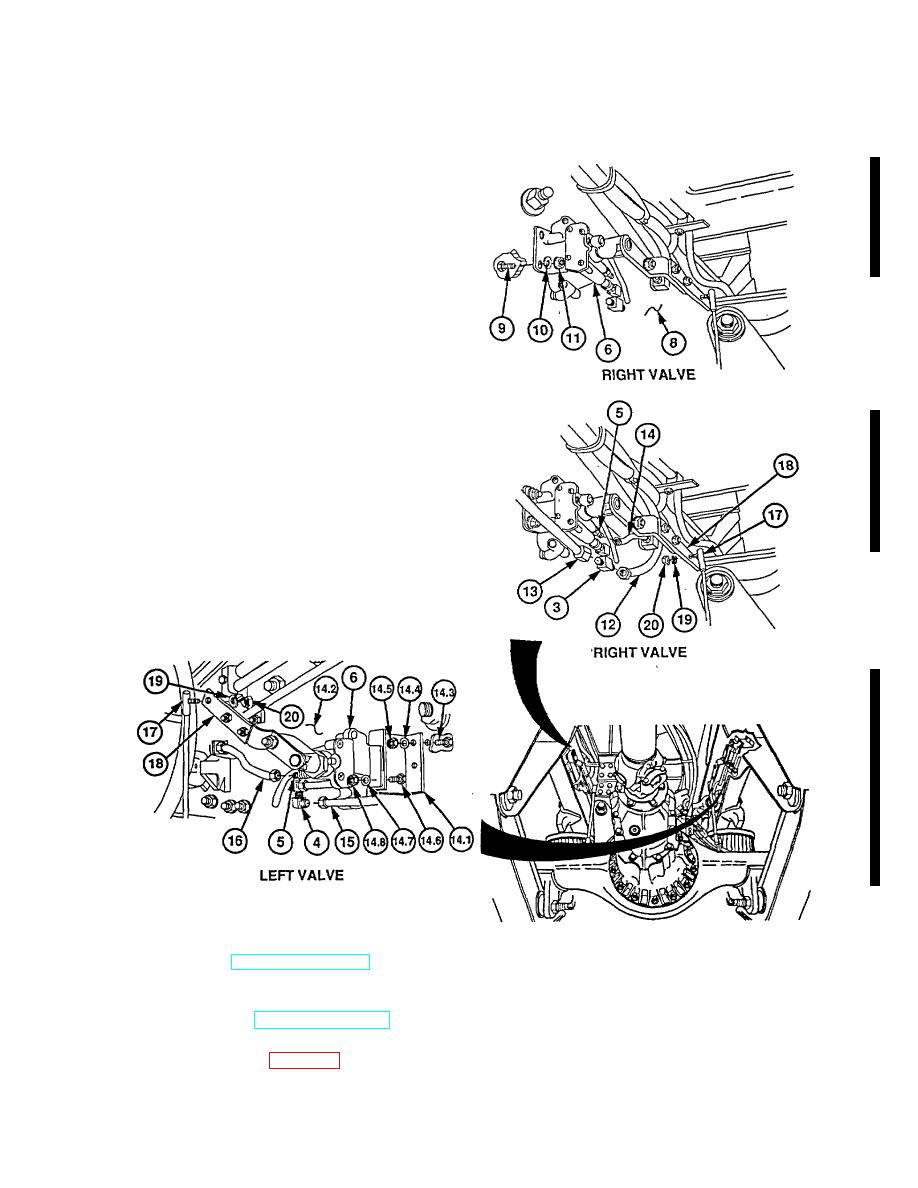
NOTE
Do steps (7), (8), and (9) when
installing right height control valve.
Do steps (9.1), (9.2), (10), and (11)
when installing left height control
valve.
(7) Install right height control valve (6) on
frame (8) with two screws (9), washers
(10), and new locknuts (11).
(8) Install hos e no. 2041 (12) and hose no.
2042 (13) on tee (3).
(9) Install hose no. 2044 (14) on fitting (5).
NOTE
If bracket was removed, do step (9.1).
(9.1) Install bracket (14.1) on frame (14.2) with
two screws (14.3), washers (14.4), and
new locknuts (14.5).
(9.2) Install left height control valve (6) on
bracket (14.1) with two screws (14.6),
washers (14.7), and new locknuts (14.8).
(10) Install hose no. 2042 (15) on elbow (4).
(11) Install hose no. 1040 (16) on fitting (5).
(12) Install ball joint (17) on valve lever arm
(18) with new lockwasher (19) and nut
(20).
c. Follow-On Maintenance
(1) Start engine (TM 9-2320-360-10).
(2) Build up air pressure to 120-125 psi (827-
862 kPa).
(3) Shut off engine (TM 9-2320-360-10).
(4) Check for leaks.
(5) Adjust ride height (para 15-4).
15-15
|
|
Privacy Statement - Press Release - Copyright Information. - Contact Us |
|
|
Integrated Publishing, Inc. - A (SDVOSB) Service Disabled Veteran Owned Small Business
|

