 |
|||
|
|
|||
|
|
|||
| ||||||||||
|
|
 TM 9-2320-285-24-2
4-4. TRANSMISSION (CONT)
b. Main Shaft and Gear Unit Assembly (cont).
STEP
LOCATION
ITEM
ACTION
REMARKS
REASSEMBLY (cont)
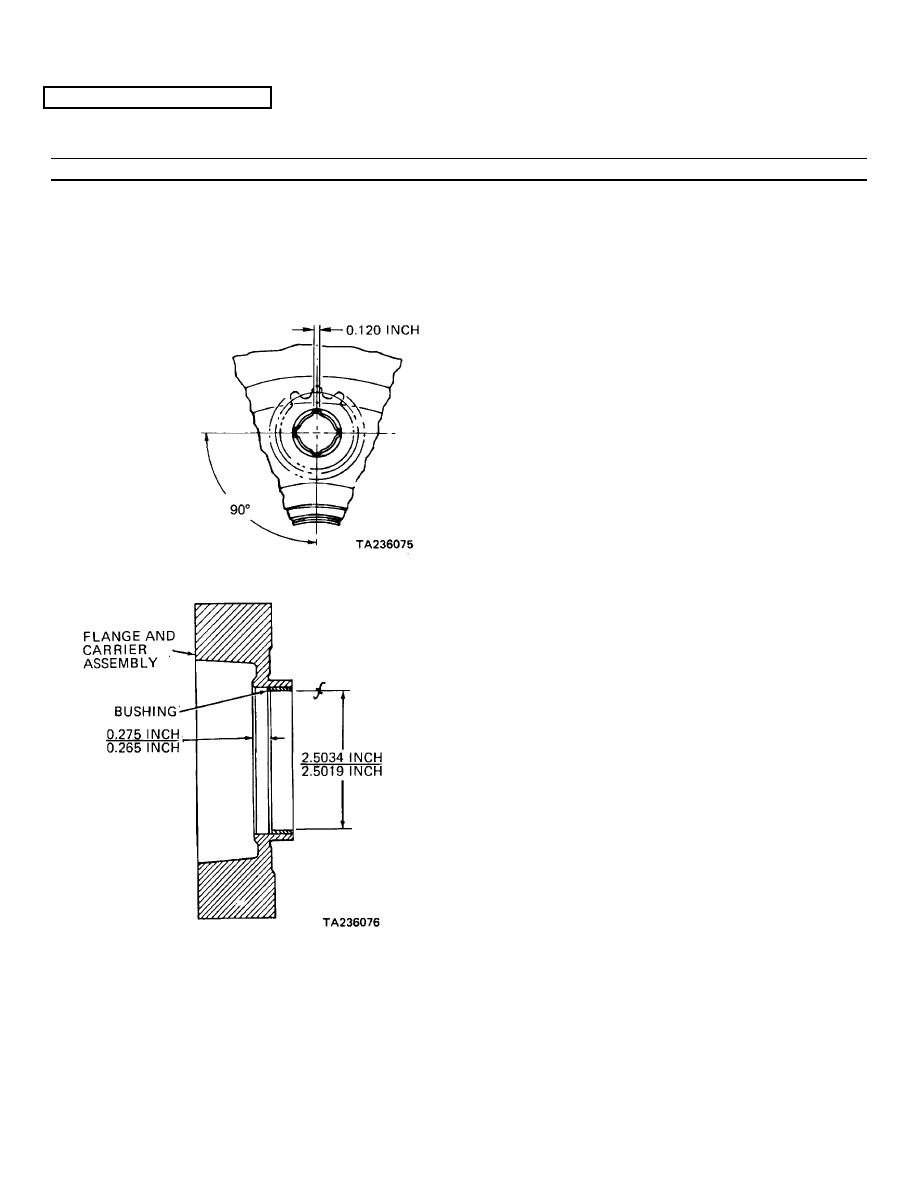
1/2 inch guide pins. Press into flange and
carrier assembly (30) until pin installer
14
touches flange and carrier assembly
(cont)
Swage. Remove flange and carrier assembly
(30) from removing, installing and swaging
f. Six pins (31)
fixture. Install bottom swaging tool holder
into fixture. Install one swaging tool
J-25587-27 into bottom swaging tool holder
and one into fixture. Lubricate both ends
of pins (31) with oil-soluble grease. Posi-
tion flange and carrier assembly (30) rear
end up on fixture. Use support block
J-25587-4 to level flange and carrier
assembly while lower swaging tool is sup-
porting lower end of pin (31). One pin at a
time, apply pressure gradually (about two
tons) to swage ends of pins against flange
and carrier assembly (30), as shown. Pinion
set (34) must rotate freely and have 0.008-
0.031 inch end play. Remove flange and
carrier assembly from fixture. Remove bot-
tom swage tool holder from fixture
Use front planetary bushing
installer to press bushing
(29) into flange and carrier
assembly to dimension shown
4-32
|
|
Privacy Statement - Press Release - Copyright Information. - Contact Us |
