 |
|||
|
|
|||
|
Page Title:
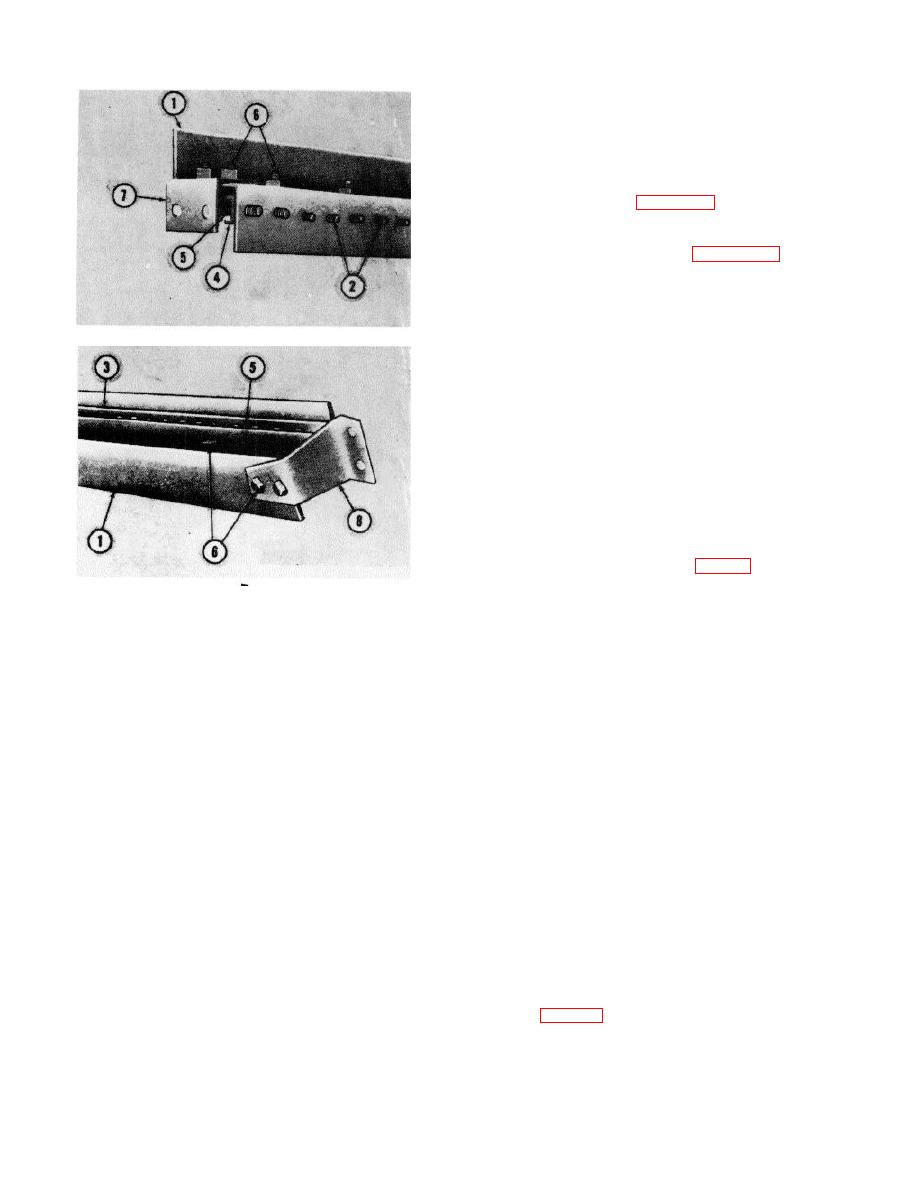
Figure 6-11. Deck rafter assembled |
|
||
| ||||||||||
|
|
 TM 5-5430-209-12
(3) Place retainer angle (5) on bolthead side of
each rafter so that the plain leg of the angle is toward
the bolts. Secure the angle to the rafter with eight l/2 by
1 inch bolts (6) and nuts.
(4) Install a rafter clip (7) on the inner end of each
rafter as shown on A, figure 6-11. Secure the clip to the
rafter with two bolts (6) and nuts.
(5) Install a rafter hanger (8) on the outer end of
each rafter as shown on B, figure 6-11. Secure the
hanger to the rafter with two bolts (6) and nuts.
c. Assembling Deck Plates.
(1) Bottom of deck plates are the side with light
colored paint. Plate lap seams are identified as right
and left by facing large end of the plates. First plate
installed is assembled with rafters under each lap seam.
No assembly is required for the last plate. Intermediate
plates are assembled with a rafter under the right lap
seam.
(2) Assemble a rafter under the right lap seam of
nineteen plates so that bolts (2) will pass through holes
in the plates, leaving two end boltholes of each plate
vacant.
CAUTION
Do not use sharp-edge tool or pipe to force
gasket over bolts. Use well rounded, smooth-
mouth tool.
(3) Install strip gasket (5, fig. 6-3) over bolts along
full length of the right lap seam. Allow 1l/2-bolthole
1.
RAFTER
overlap at each end.
2.
BOLT
NOTE
3.
LONG CHANNEL
When there is a break in the gasket
4.
SHORT CHANNEL
material, ends should overlap two
5.
RETAINER ANGLE
boltholes and be cut squarely across the
6.
BOLT
second hole. Apply sealing compound to
7.
RAFTER CLIP
each end of overlapped gasket to insure a
8.
RAFTER HANGER
leakproof joint.
ME 5430-209-12/6-11
(4) Install a nut loosely on each end bolt and
Figure 6-11. Deck rafter assembled.
middle bolt to hold plate and rafter together during
installation.
(1) Insert /2 by 11/4 inch bolts (2) through long
channel (3) and short channel (4) for each rafter (1).
(5) On one of the nineteen previously assembled
(2) Block up each rafter, top side down. Insert bolts
plates, assemble a rafter under the left lap seam. Follow
(2) of long channel (3) in the rafters, starting at the outer
procedures in steps (2), (3), and (4) above. This will be
end. Insert bolts (2) of short channel (4) in the rafters
the first plate installed.
next to long channel (3). Be sure bolt heads are seated
squarely in the channels.
d.
Assembling Special Plates.
NOTE
If tank is to be used for water storage,
omit the two pressure vacuum valves and
substitute the blind hatch flange.
(1) For each deck plate, insert '/2 by 11/2-inch
bolts (1, fig. 6-12) in eight 2-hole bolt channels (2).
6-13
|
|
Privacy Statement - Press Release - Copyright Information. - Contact Us |
